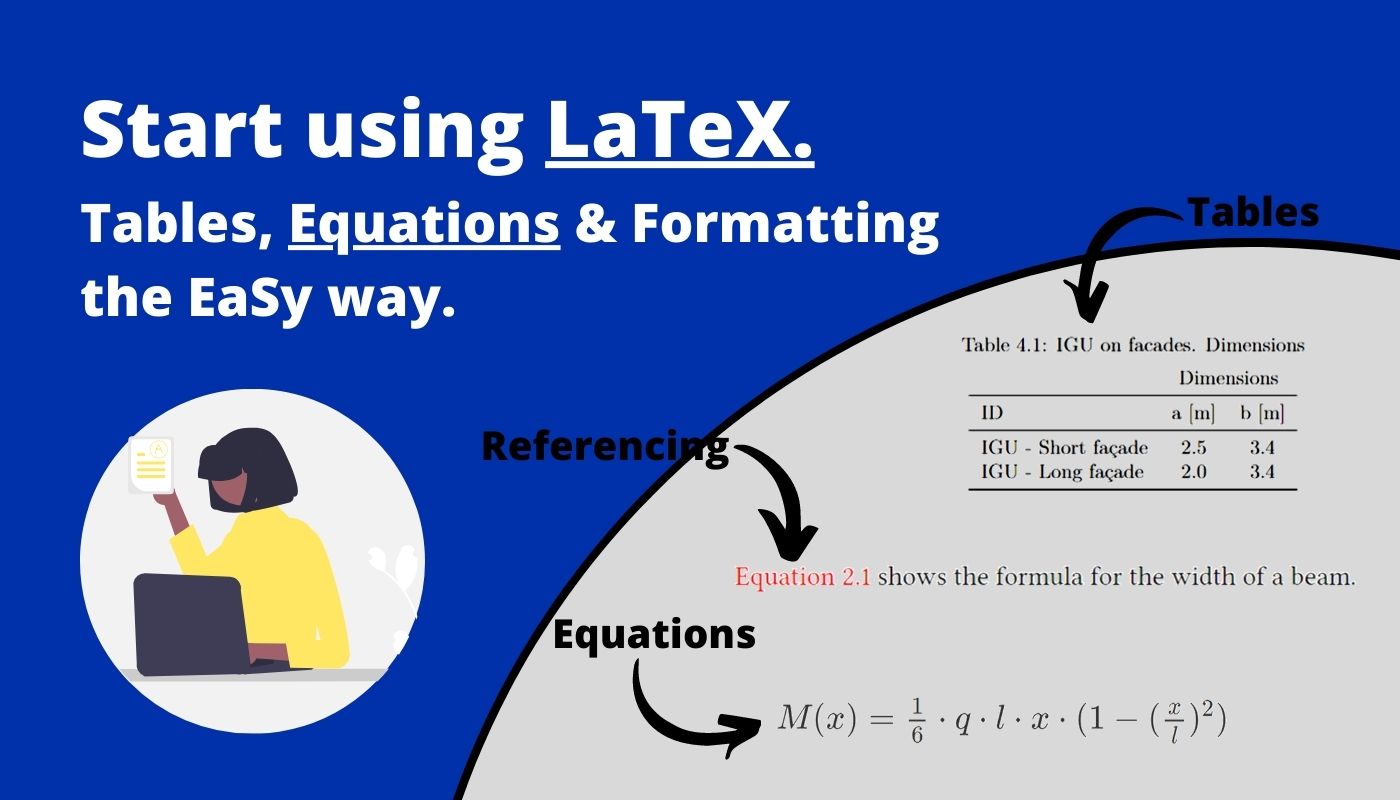
Getting started with LaTeX in 2026 – 13 beginner tips
Let’s face it. Writing formulas and Greek letters in Word or Google Doc is time-consuming.
This is unfortunate because it slows down our productivity, drowns our energy and maybe even our mood?
But there is luckily a better tool, called LaTeX, which makes formula documentation easy and fast.
So in this article, I’ll show you LaTeX – and give you a step-by-step guide on how to get started.
Before we get started, 2 things.
What is LaTeX?
LaTeX is a software system which automizes the formatting of documents, so users can focus more on the content. Users use plain text to create formulas, greek letters, etc. For example, instead of clicking on an icon that creates the letter $\alpha$, you type in \$\alpha$
And who is LaTeX for?
- Engineers, Scientists & other professionals documenting calculations.
- Students.
- Invoice clerks, accountants, etc.
- And anyone who wants to speed up the formatting of documents.
Alright, let’s jump into it.
1. Choosing the LaTeX Editor
LaTeX itself is a software system, and not a software program.
It’s like a programming language. Python for example is the language, but you are using Python in Code editors (IDE’s) to create programs, documents, calculations, etc.
So in order to use LaTeX, we need to pick a LaTeX Editor.
There are plenty of different LaTeX editors and for this tutorial we use Overleaf, because
- it is cloud based
- free for personal use and 2 person collaboration
- and very easy to get started because we don’t need to install anything on our computers.
But here is an article comparing other LaTeX editors. No worries, you can easily follow along this tutorial if you are using another editor.
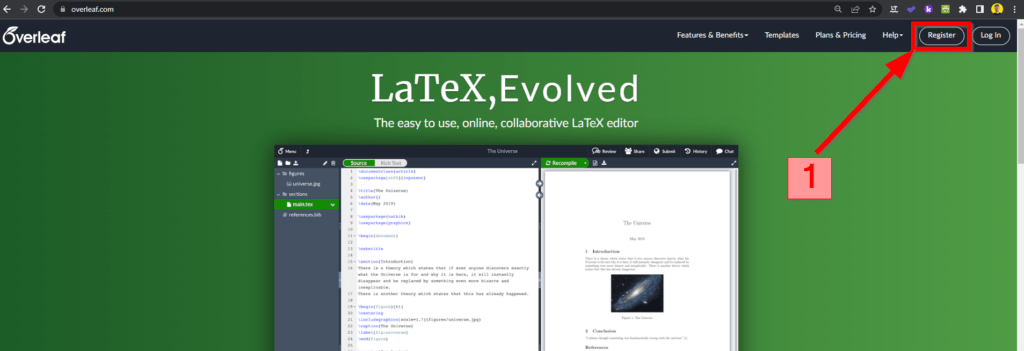
So to get started with Overleaf, click on this link and create an account for free.
Alright, once the account is created, we are ready to pick a template, because we do not want to start from scratch.
Keep that in mind. It’s better to spend some time to find a good template instead of starting from scratch and setting up the document yourself.
2. Choosing a template
Choosing a template is the most important thing about working with LaTeX. There is no discussion about that.
I made that big mistake myself when I first used LaTeX in my bachelor thesis. It was pain and I wished I would have chosen Word back then.
But, when you have a good template and a bit of experience, then there is no better software for documenting your calculation reports than LaTeX.
So, what template should you use?
- In case you are a student, your university most likely has a template online and if it is a university report, then it makes sense to start off with that template. Later on, you could customize that template for your needs.
- If you aren’t a student or university employee, you can find thousands of templates online. Just google, and you will find lots of free templates.
For example, Overleaf has many templates for different use cases, such as Book, Presentation, Thesis, Academic Journal and CV’s which you can find here.
For our tutorial, we will also use a template that I found in the Overleaf templates library. It’s very basic and doesn’t overcomplicate things. But be aware that for your thesis you might want to use a more detailed template – or in best case scenario a template from your university.
This is the template for this tutorial (Link). Click on “Open as Template“.
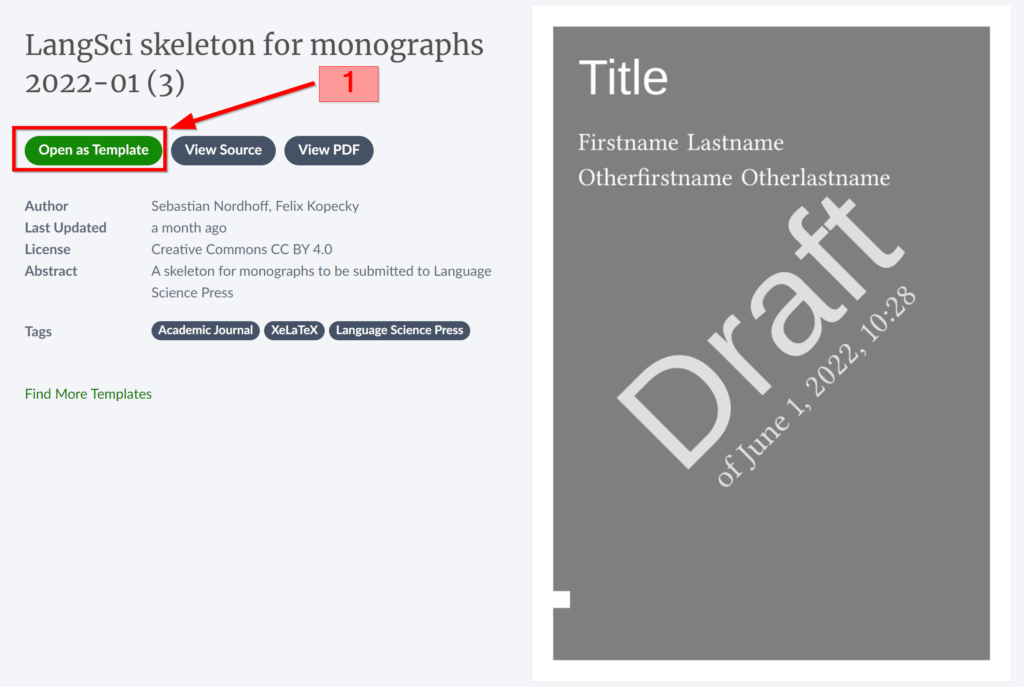
If you haven’t signed in, sign in or create a free account if you haven’t create one yet.
Welcome to the Overleaf Interface.
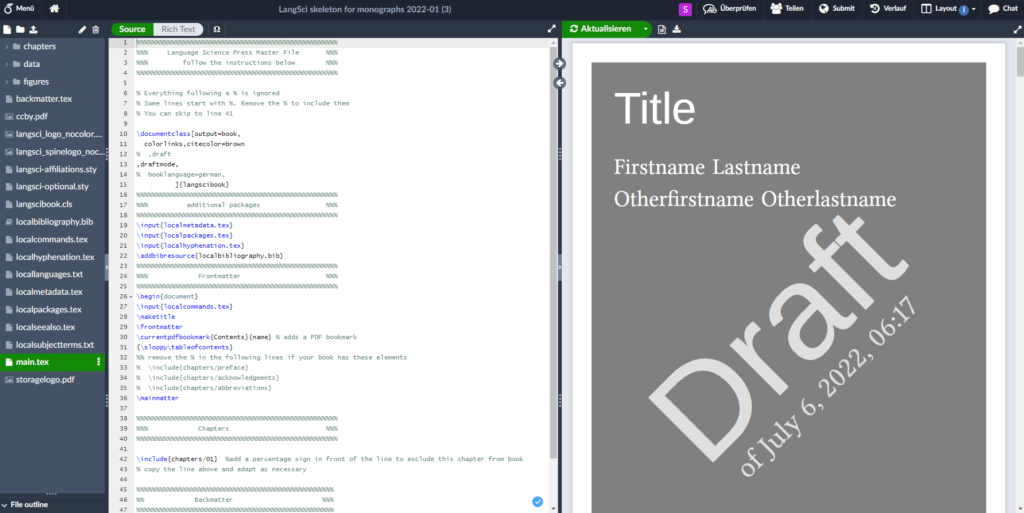
I know, this might be overwhelming, but stick with us – it will all make sense and the benefits are big.
3. The User interface
This section will be brief, because we don’t want to overcomplicate stuff, and we will explain more features of the UI as we go along in this article.
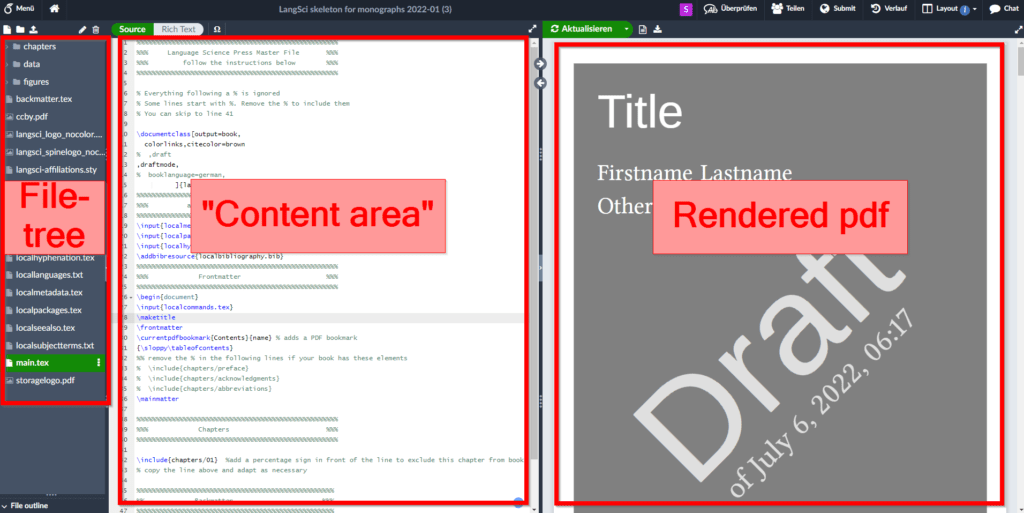
The 3 most important things you need to know for now are:
- The rendered document, where you see a preview of the PDF.
- The “content area”, where you write text, formulas, etc.
- The file-tree, where you see different folders and files within your project. We will for example upload images to folders in the File-tree and the text files that we see in the “Content area” can be accessed from the File-tree.
4. Table of contents & Sections
So let’s start off by looking at the table of contents and sections to bring in some structure in our document.
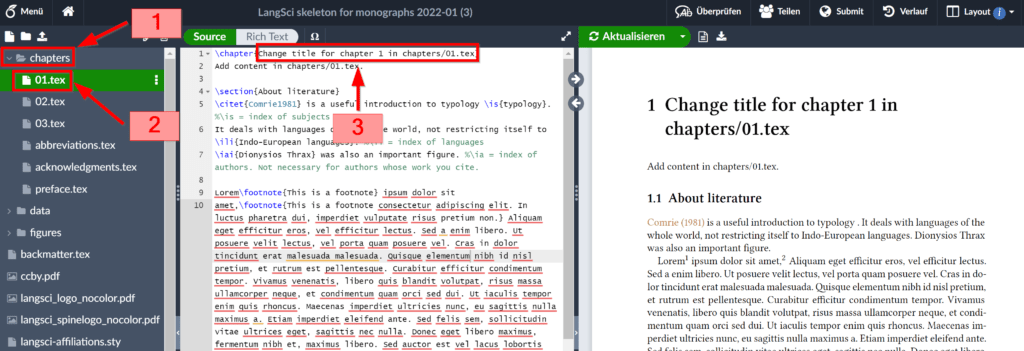
Scroll to page 5 in the rendered PDF page, where you will find a table of contents which looks like this.

To change the section title “1 Change title for chapter 1 in chapters/01.tex”, open the folder called chapters (1) in the File-tree, click on 01.tex (2) and change the text inside the {} after \chapter (3).
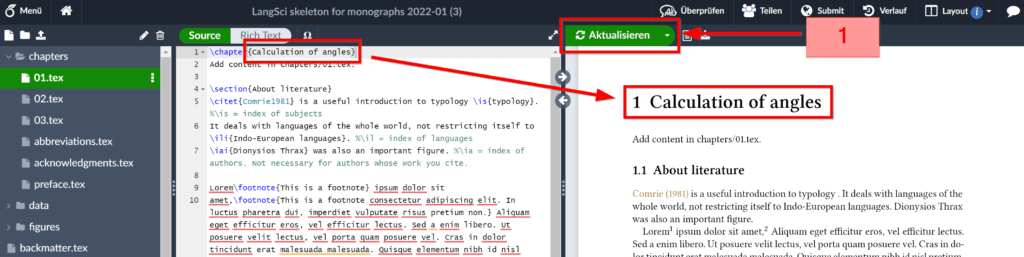
Let’s change the chapter/section title to Calculation of angles.
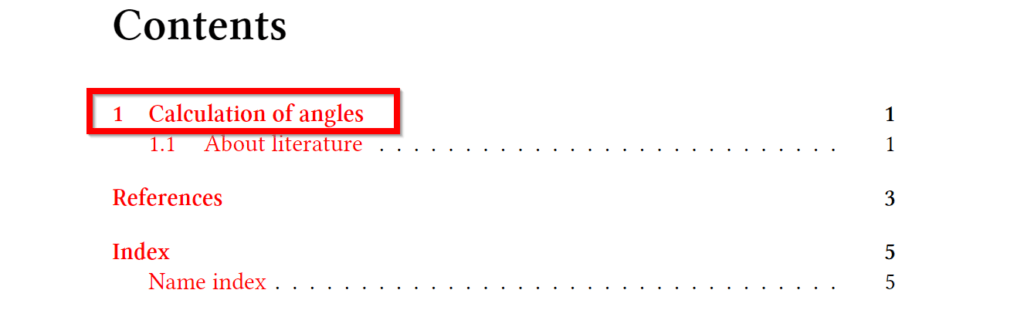
Click on refresh, and you will see that both the title name changed and the title in the table of contents.
Now, how do we add other chapters and sections?
Well, before that, let’s delete most of the text in the 01.tex file, because it is distracting.
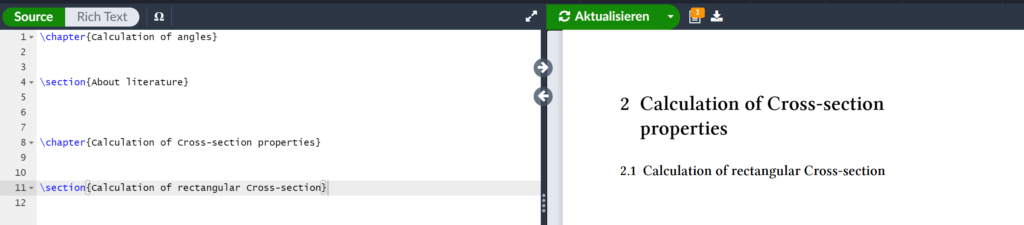
When we now write \chapter{Calculation of Cross-section properties} and \section{Calculation of rectangular Cross-section} after refreshing, we see that chapter 2 and section 2.1 are added. Also in the table of contents.
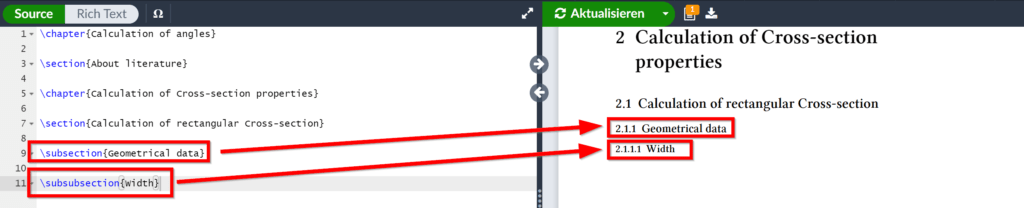
We can go even deeper and add subsections and subsubsections.
5. Equations
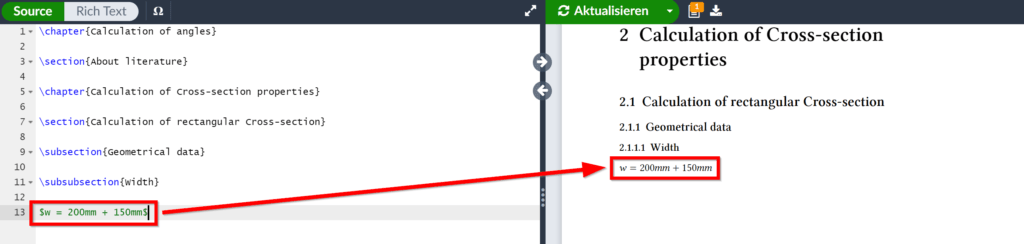
The easiest and quickest way to write equations is by simply writing between $$ such as
\$ $width = 200mm + 150mm$ $
Now, often you want to number equations and formulas, so the reader will have it easier to find it when referred to.
To do so, write the equation or formula between
\begin{equation}
	formula
\end{equation}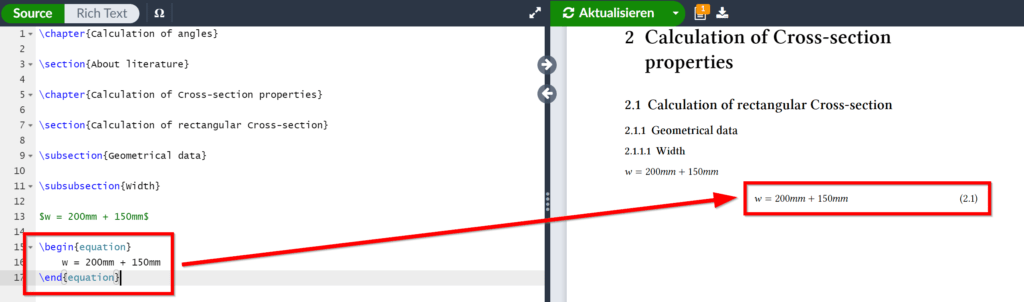
You will see another advantage of this method later on as we will automatically link text with equations, tables and sections.
6. Subscripts
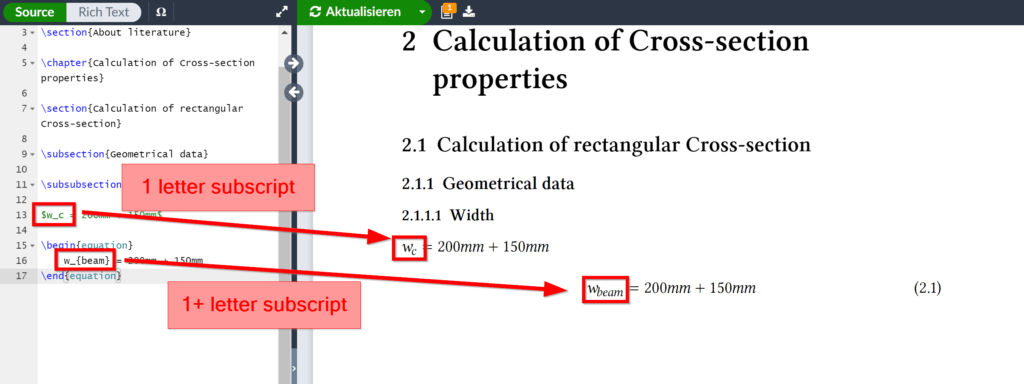
Let’s be honest, we always use loads of subscripts in our documentation, and it looks nice!
But doesn’t it take super long and a few clicks in Word to do subscripts?
Well, in LaTeX it is as much as the sign “_” for a 1 letter subscript and “_{xxx}” for a multiple letter subscript.
Let’s look at an example.
7. Greek letters
When writing technical engineering or maths reports, we probably can’t make our way around Greek letters.
Here’s how we use Greek letters in latex!
Let’s say we want to define a variable as $\alpha = 20°$, then what you do, is basically you write the Greek letter after a backslash. In our case, it is \alpha.
And don’t forget $$!
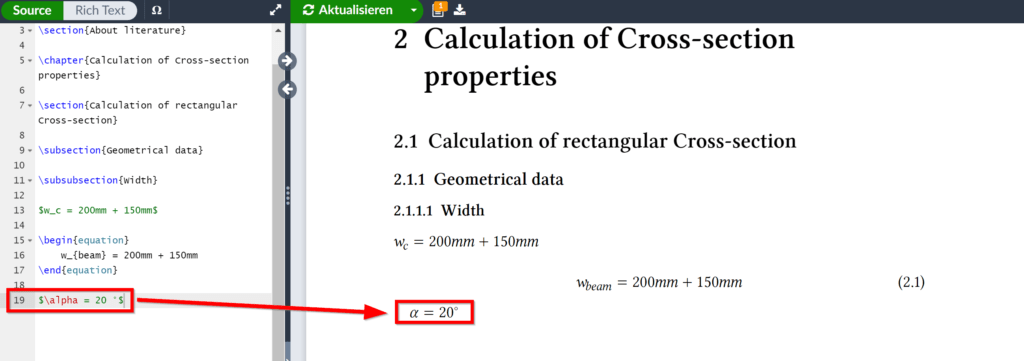
You can find a list of all Greek letters and their LaTeX code here.
7. Insert pictures
Pictures have to be in a good report. There is this old quote to which I completely agree:
A picture is worth a thousand words.
But how do we insert pictures in our LaTeX document?
First, upload the picture to the document:
Right click on figures in the file-tree >> Upload >> Select an image
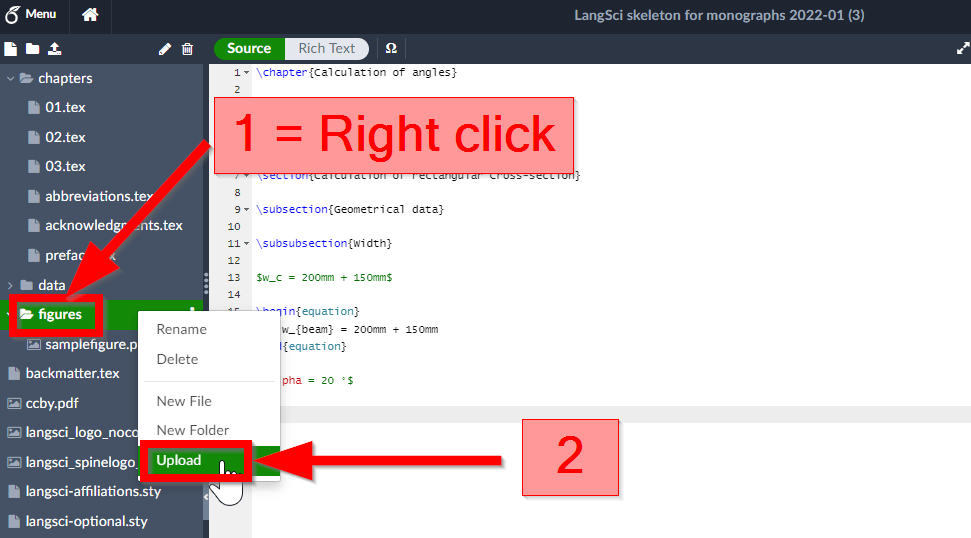
Then, insert the following code in the Content Area.
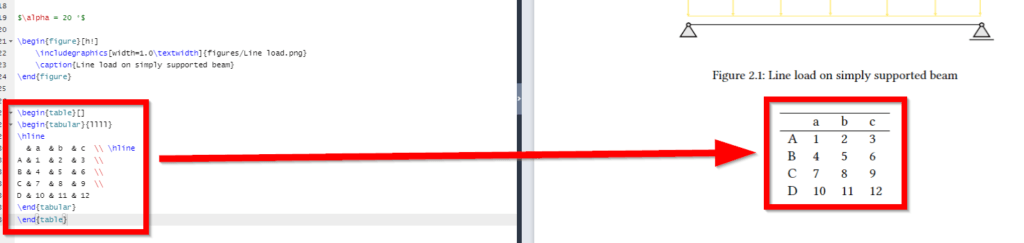
\begin{figure}[h!]
    \includegraphics[width=1.0\textwidth]{figures/Line load.png}
    \caption{Line load on simply supported beam}
\end{figure}
Be aware that the code above applies to my picture, which is called Line load.png. Just replace the text with the name of your uploaded picture.

The picture above also shows how to add an image caption. You can of course delete this if you wish.
Furthermore, with [width=1.0\textwidth] you can scale the image. 1.0 uses the whole width of the document, while 0.85 for example only 85%. You can play around with this to see how it works.
There are a lot more features that you can add to the images, but this code is enough to get started. You can read more about images in Overleaf here.
9. Tables
Tables can be very tricky in LaTeX, but you can also make your life easy and use another tool that creates the table for you, so you only have to copy & paste code.
Let’s have a look at how that works.
Click here to open the LaTeX Tables Generator.
Now, create a table you want, copy the code to your clipboard and paste it in your LaTeX document.
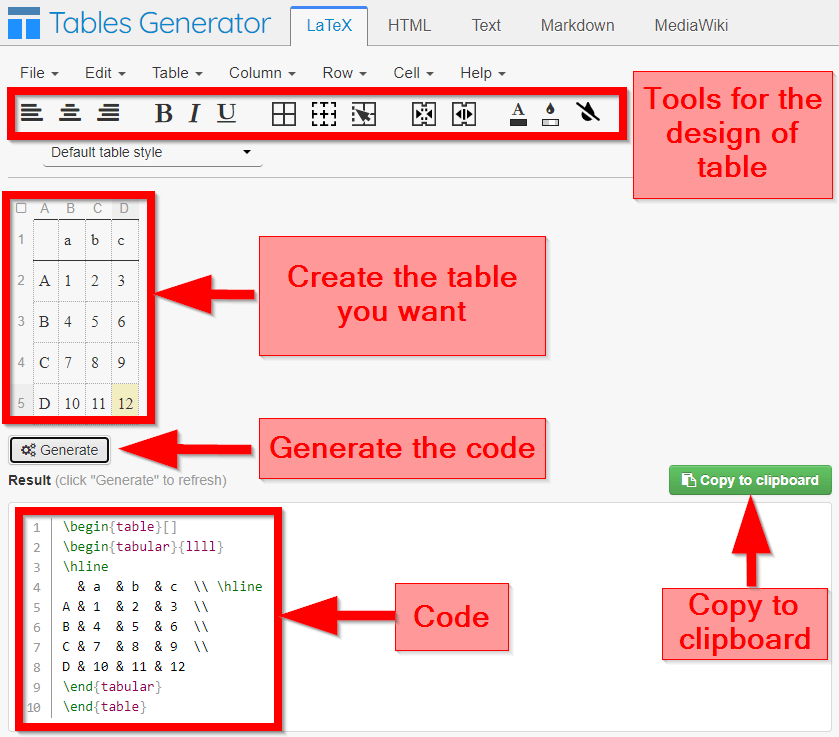
Et voilà, your first LaTeX table is created.👍
10. Bulleted list
To do a bulleted list like this
- 1
- 2
copy & paste the following code.
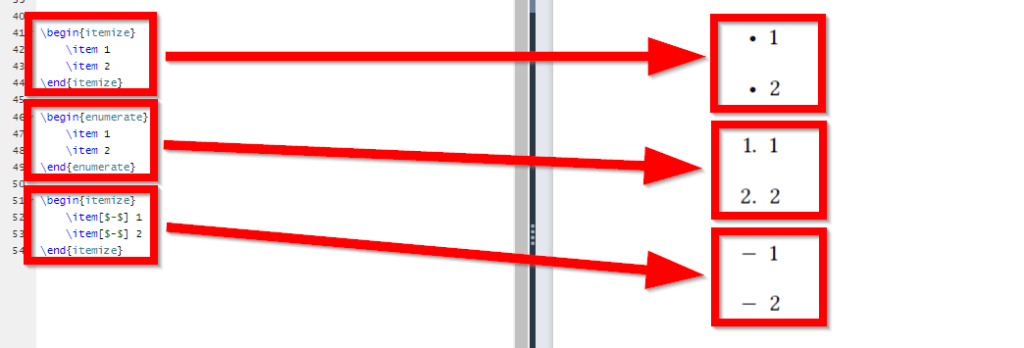
\begin{itemize}
    \item 1
    \item 2
\end{itemize}
To add more bullet points, just add another line of \item.
Instead of dots you can of course also have dashes, numbers and other things by changing from itemize within the {} to
- enumerate for numbers (1., 2., 3., ..)
- itemize for dashes (-) + [$-$] after \item
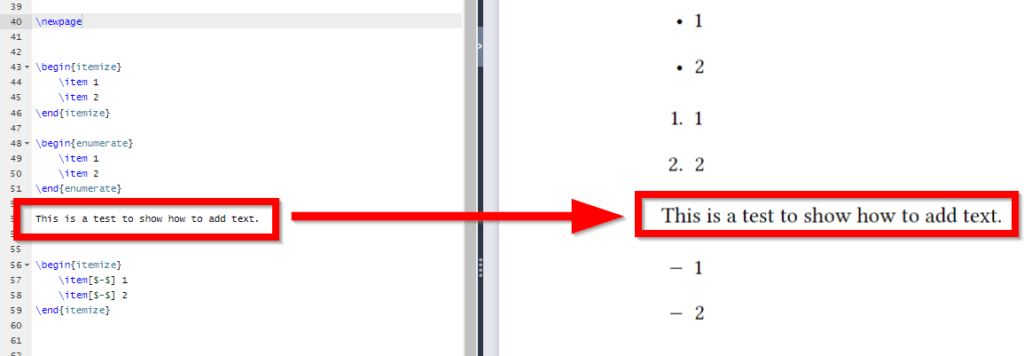
11. Adding text
So far, we have only talked about formulas and other maths related stuff, but our document needs of course also some text.
But there is actually not much to it.
You simply just write the text you want in the content area.
You can also make the text bold, underlined, coloured, italic and many more things.

12. Reference images, tables & sections
Referencing in LaTeX is one of the biggest advantages compared to other programs.
Referencing works basically the same way for images, tables, images, formulas, etc.
We always label what we want to reference. Let’s have a look at an image. Simply add
\label{Whateveryouwanthere}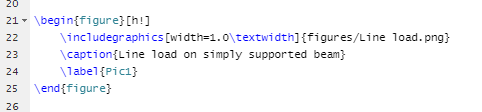
Now, when we add \ ref{Pic1} or \autoref{Pic1} anywhere in the document, a link is automatically created.
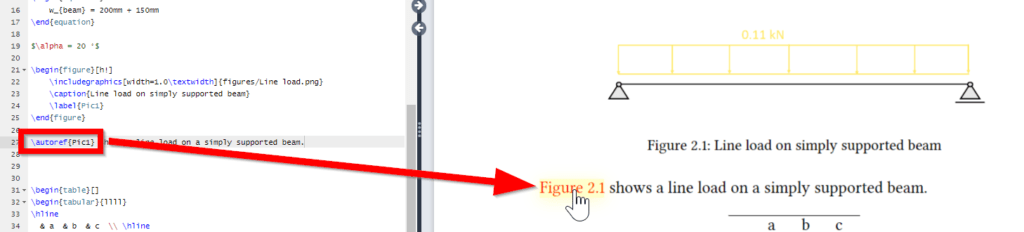
Even when you export a PDF file, and you click on “Figure 2.1” it will jump to the referenced image.
It works the same way for equations and tables. Have a look.


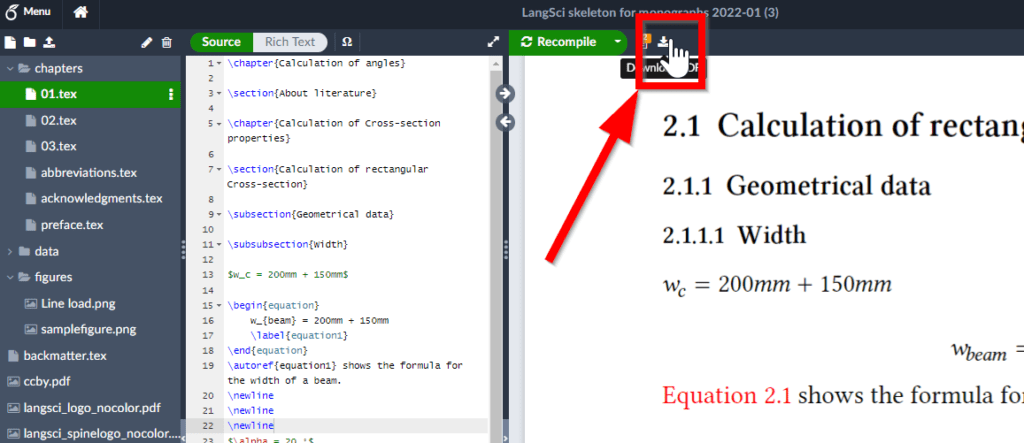
13. Exporting the PDF file
Finally, we are done with our report, and we want to export a PDF file.
Click on Download PDF. The PDF will be generated and downloaded.
Conclusion
I have to be honest with you. The start into the world of LaTeX might be hard and frustrating at times. You will need to do a lot of googling, your document will sometimes have errors, and you will probably be quite slow in creating your first document.
But the advantages of it are worth giving it a try. Those advantages are:
- Easy referencing that always works. How often did it happen to you in other documentation tools that there was a figure 1 and figure 3 but a figure 2 for example was missing? This doesn’t happen in LaTeX.
- Pick a good template, and you don’t have to format.
- Flexibility of tables. All kind of tables can be generated.
- Super easy text based formulas, Greek letters, bulleted list, etc.
- And many more great features, which we will cover in an advanced LaTeX article.
![How To Link Mendeley To Overleaf [Step-By-Step]](https://www.structuralbasics.com/wp-content/uploads/2023/06/Link-Mendeley-to-Overleaf-768x439.jpg)