Dotbim: Export A 3D Model From Grasshopper As .bim Format
As you might have seen – we use a lot of pictures of 3D models to explain structures in our blog articles.
Recently, I came across a new file format which makes it possible to include 3D models on your homepage with literally 0 code. This file format is called dotbim or .bim.
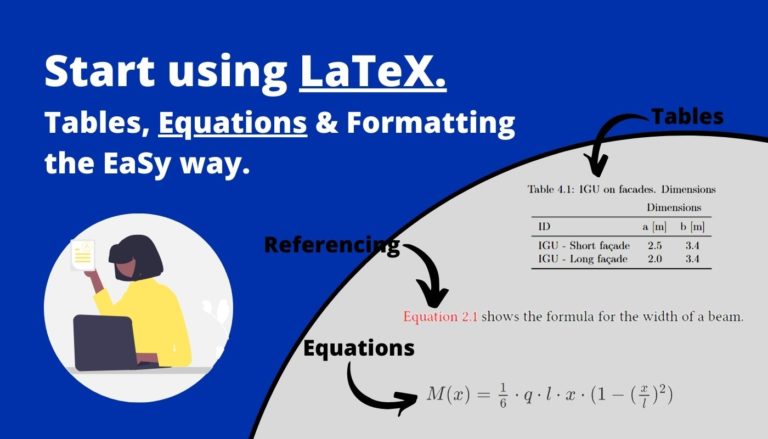
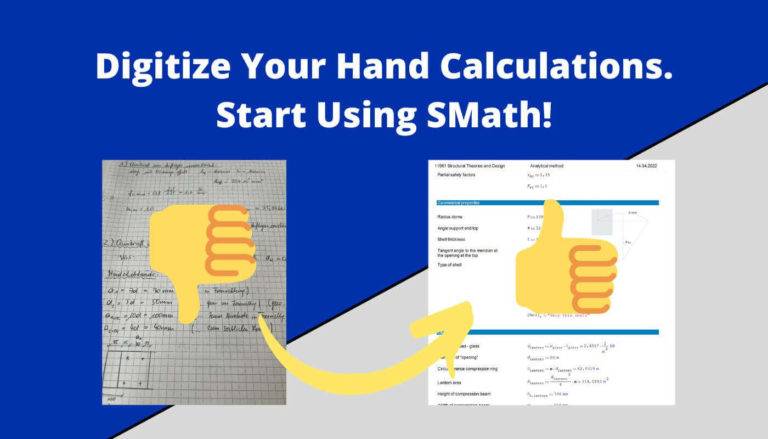
We have already included .bim 3D models in those articles:
In this How to guide we’ll show, step-by-step, how to install the dotbim Grasshopper plugin, build up a Grasshopper script that exports a Rhino/Grasshopper 3D model and how you can easily show the .bim file on your blog or homepage.
Here’s a quick summary of the steps we follow to export a .bim file
Not much more talk, let’s get started.
1. What is the .bim format?
In short: The .bim or dotbim format is a free and open-source file format that allows to visualize and transfer Geometry by triangulated meshes in an easy way.
You can read more about the details on its homepage here.
2. Installation of the dotbim Grasshopper plugin
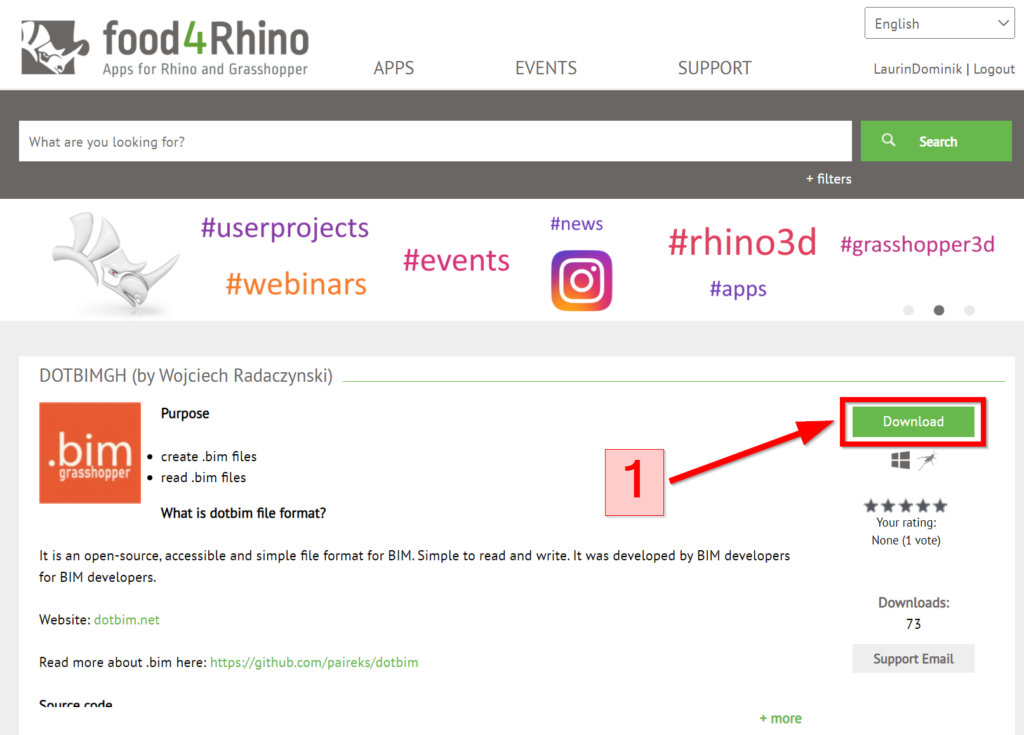
To install the plugin head over to the Food4Rhino page of dotbimGH with this link. If you don’t have an account yet, create one and then click on download.
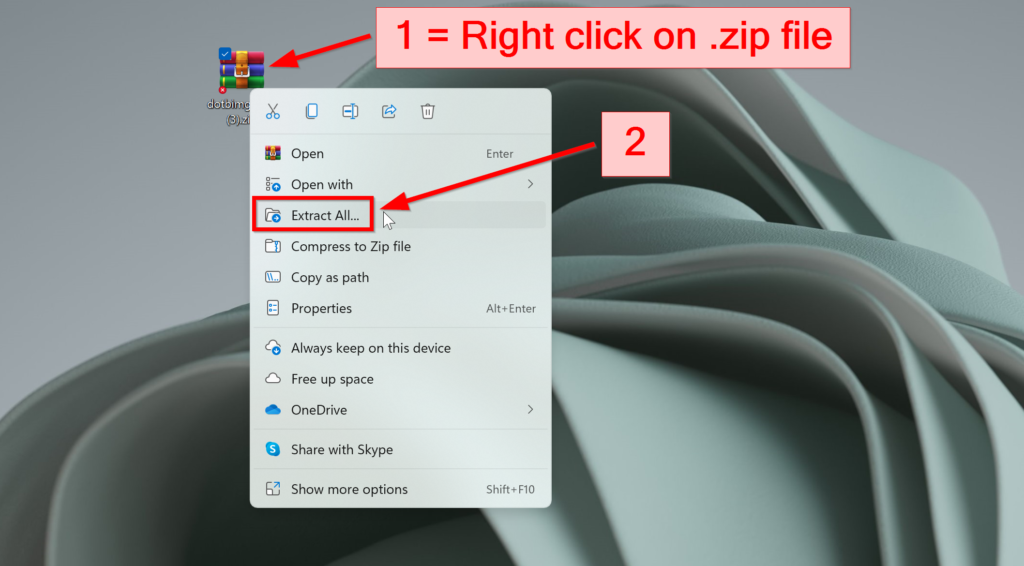
Extract the dotbim .zip file that you downloaded.
Next, open up Rhino and Grasshopper. In Grasshopper click on the following buttons:
File >> Special Folders >> Components Folder (Folder opens up)
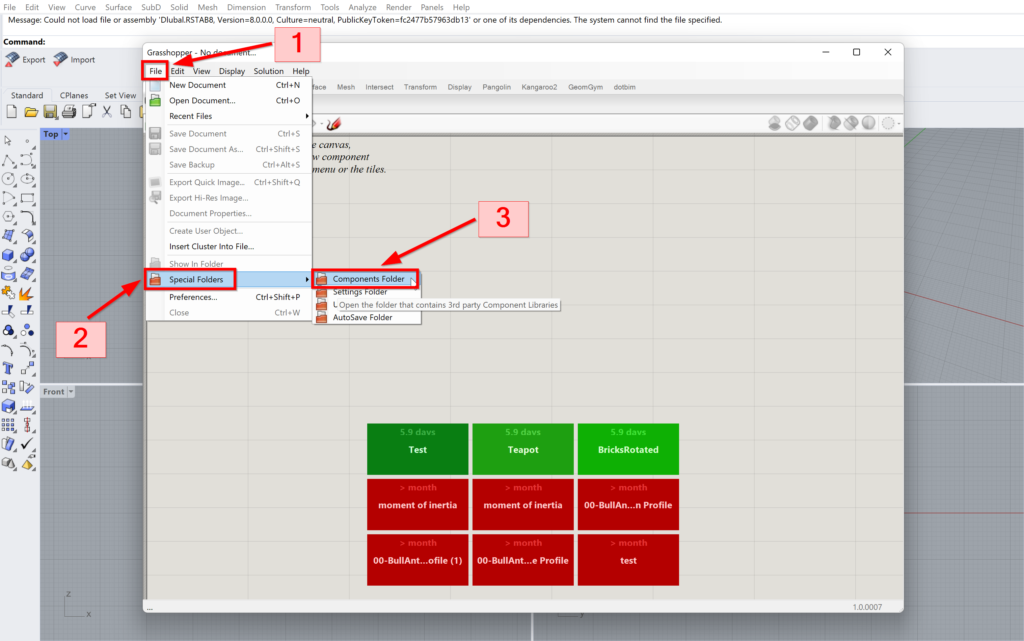
Move the folder inside the extracted folder (from .zip file) into the Components Folder.
Go into the folder dotbimGH.
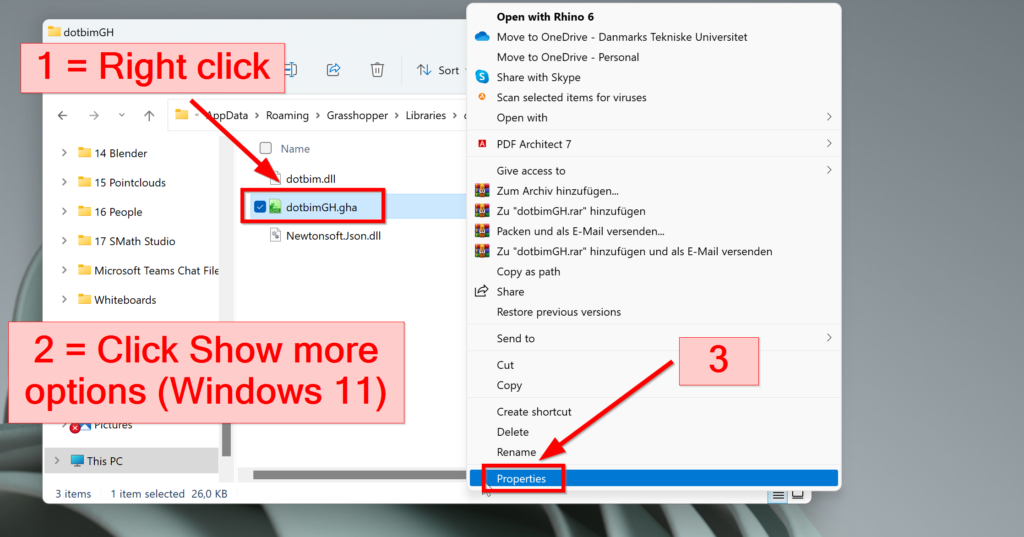
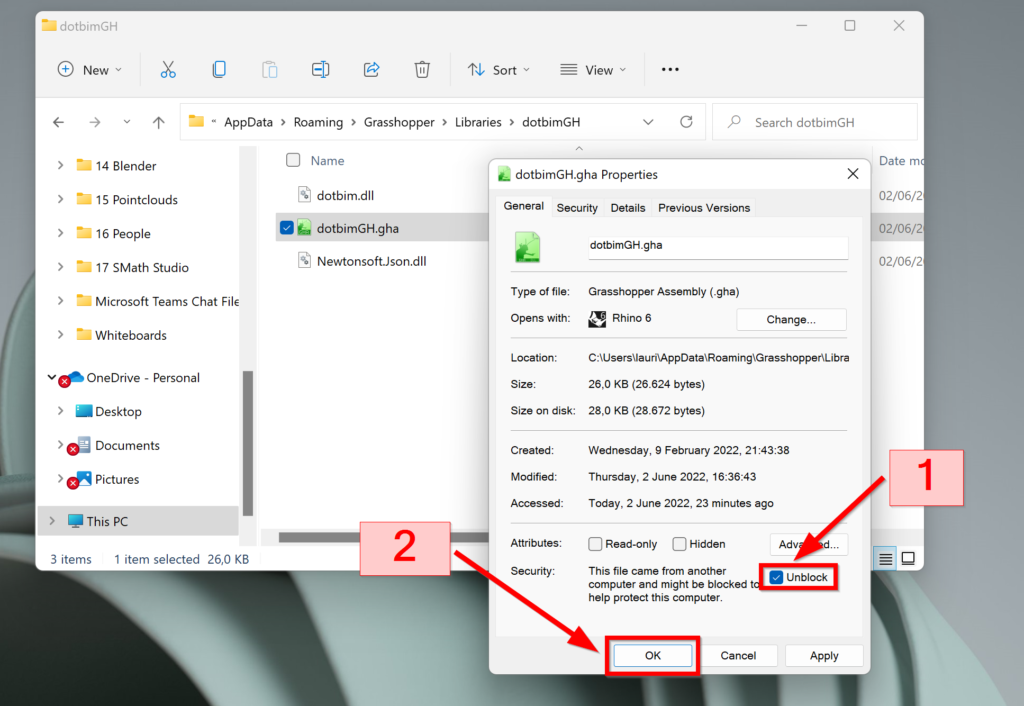
Right click on the dotbimGH.gha >> Show more options (Windows 11) >> Properties >> Click Unblock
Drag and drop the .gha file into the Grasshopper UI.
Now we are all set up with the plugin. As a confirmation we should see the dotbim button with its 2 panels and 8 components.
3. The Grasshopper Script
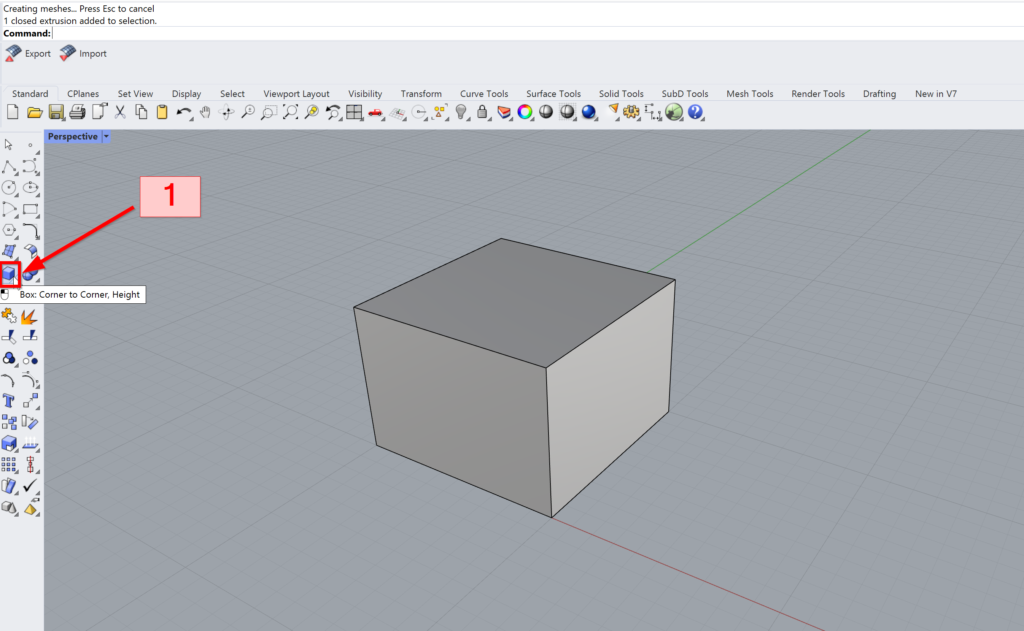
The best way to explain things is by doing examples. So in this section we will model a cube and show how to export that cube to the .bim file format.
Later on we will export a model with a few more elements.
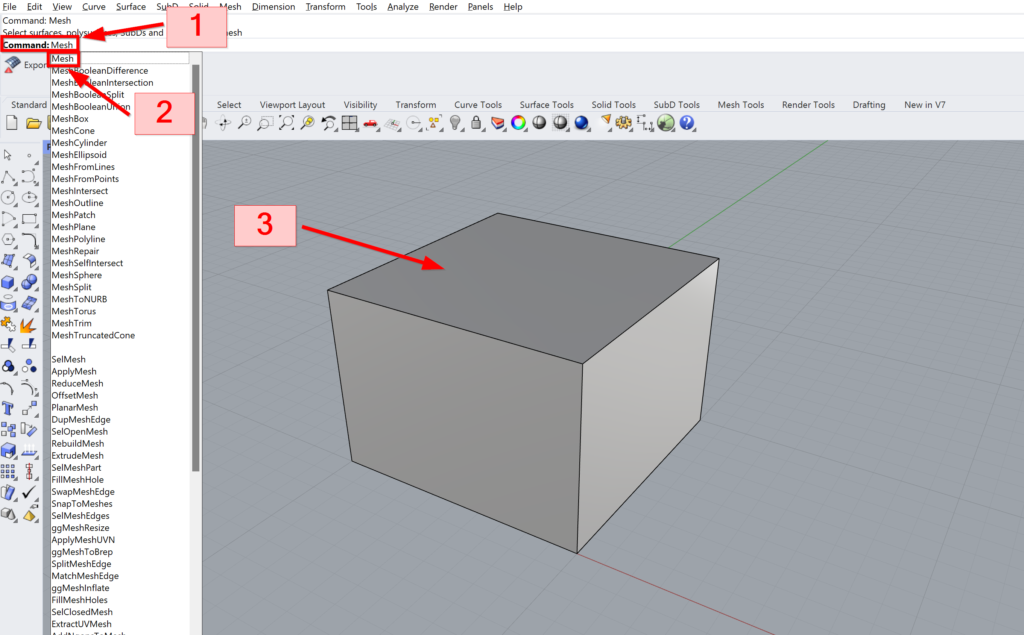
Let’s start by modeling the cube with the Box command.
As we learned earlier, the .bim file format uses meshes. Therefore we need to transform the cube in a mesh.
To do that type in the command line Mesh, click enter and select the cube.
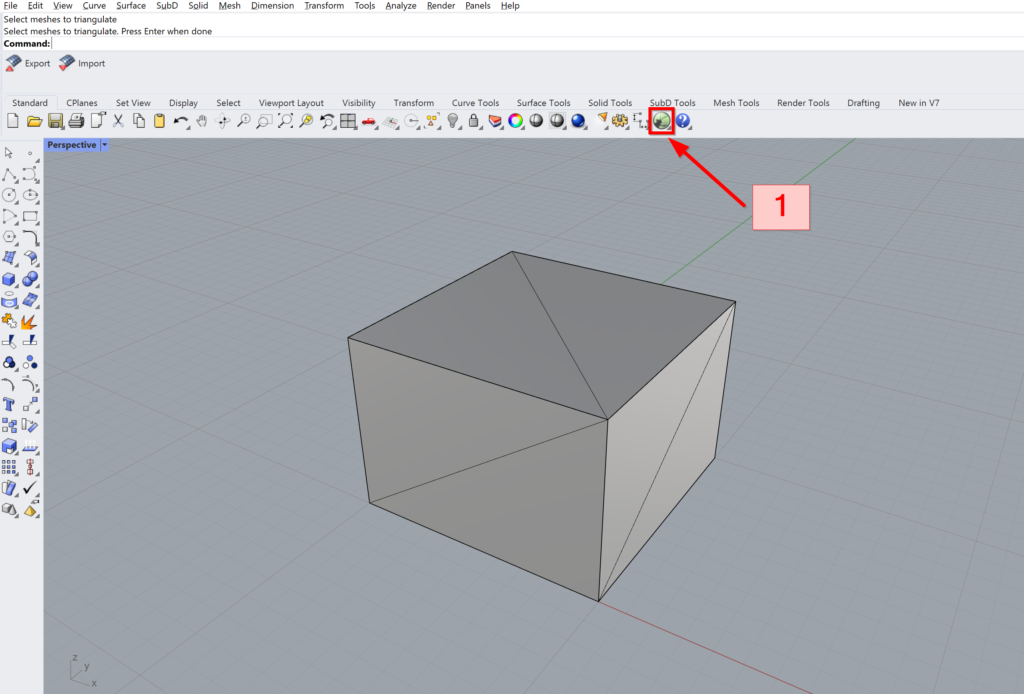
❗Another important thing to do before scripting in Grasshopper: The script will only generate a .bim file if the mesh is triangulated.
To triangulate the mesh – type in the command line TriangulateMesh and select the mesh.

The next step is to open up Grasshopper. Click on the Grasshopper icon or type in the command line Grasshopper.
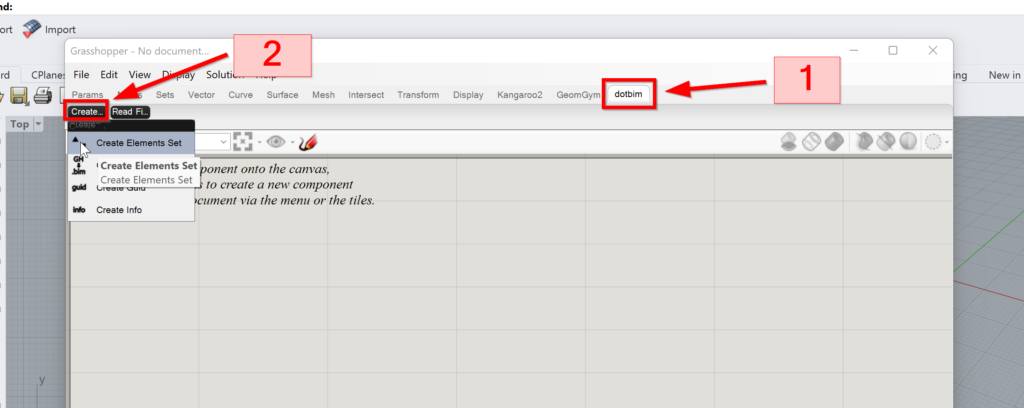
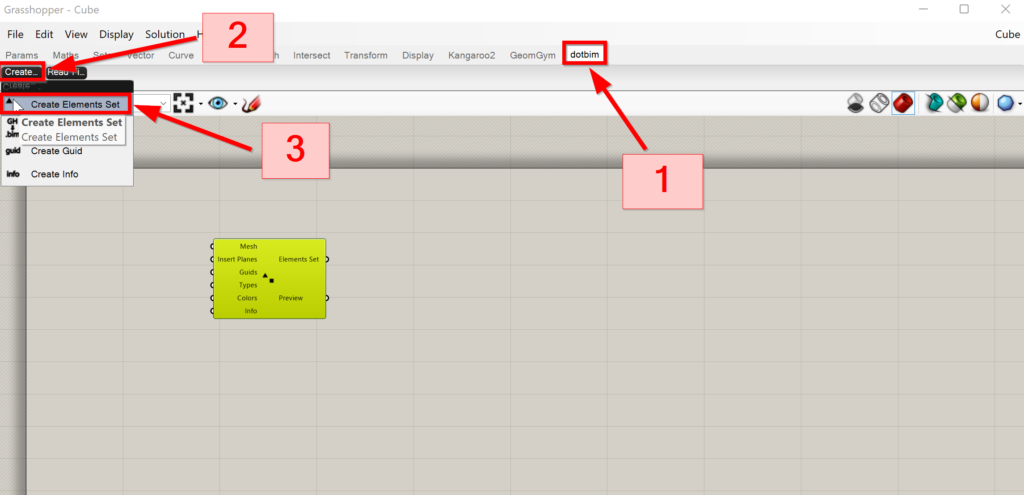
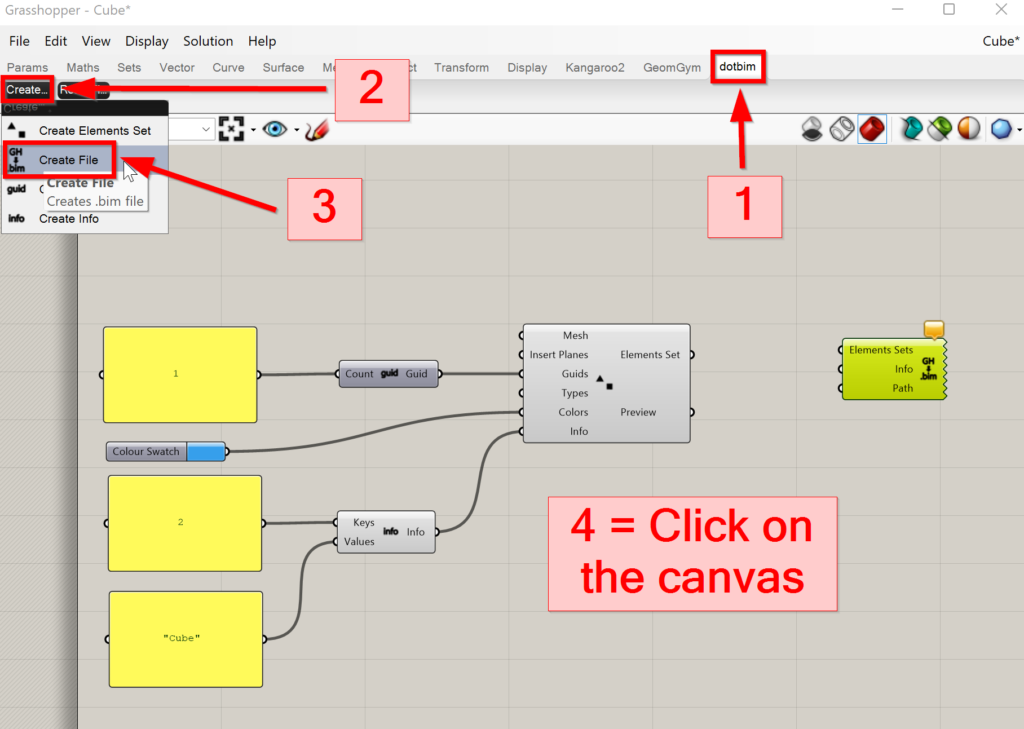
The first thing we do in Grasshopper is to create an Element Set from the triangulated mesh with the component of the dotbim plugin.
dotbim >> Create >> Create Elements Set >> Click on GH Canvas
We can see that in order to create a Elements Set from meshes we need to provide the component with 6 inputs:
- Mesh
- Insert Planes
- Guids
- Types
- Colors
- Info
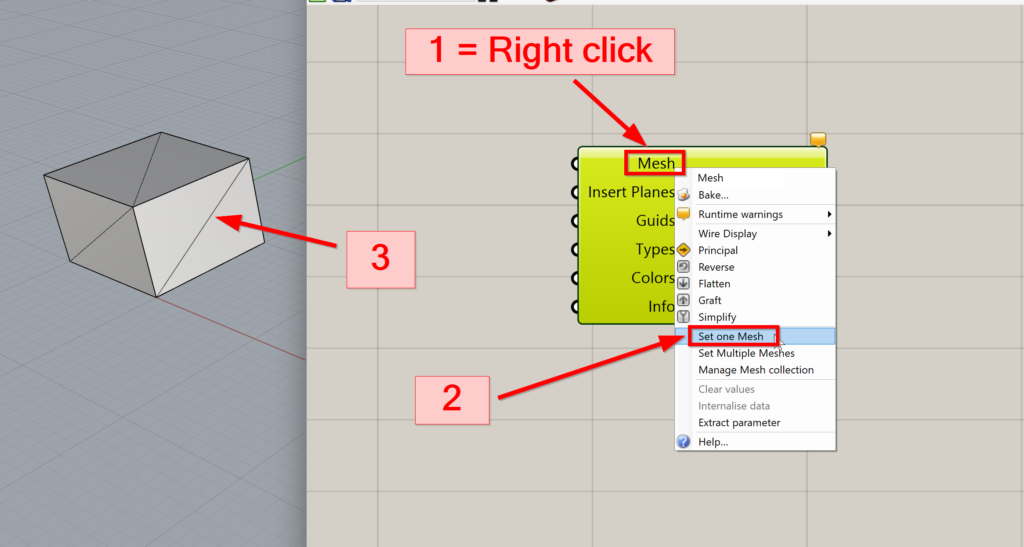
The quickest way to input the triangulated mesh is by right click on the mesh input of the component >> Set one Mesh >> Click triangulated mesh in Rhino
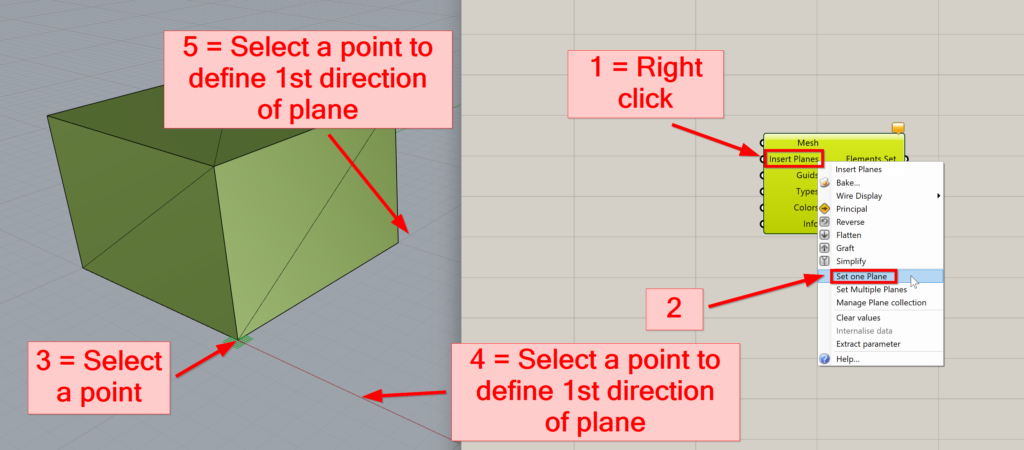
Do the following to satisfy the Insert Planes Input
Right click on Insert Planes on the Elements Set component >> Click on Set one Plane >> Select a point in Rhino which is the point of origin of the plane >> Select another point to define the first direction of the plane >> Select another point which defines the second direction of the plane
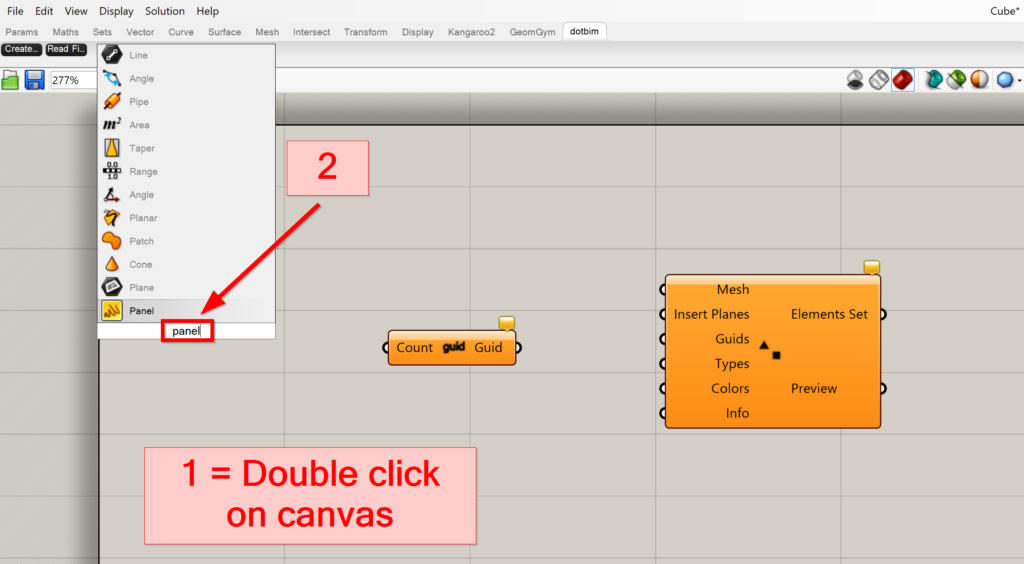
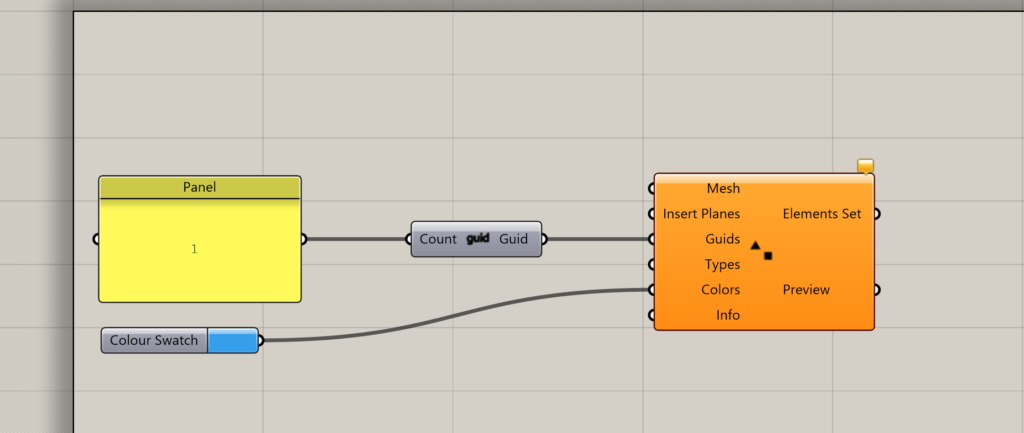
For the Guids input we use another component of the plugin.
dotbim >> Create >> Create Elements Set >> Click on GH Canvas >> Panel with any number >> Connect Panel with Create Guid component >> Connect Create Guid component with Guids input (Elements Set)

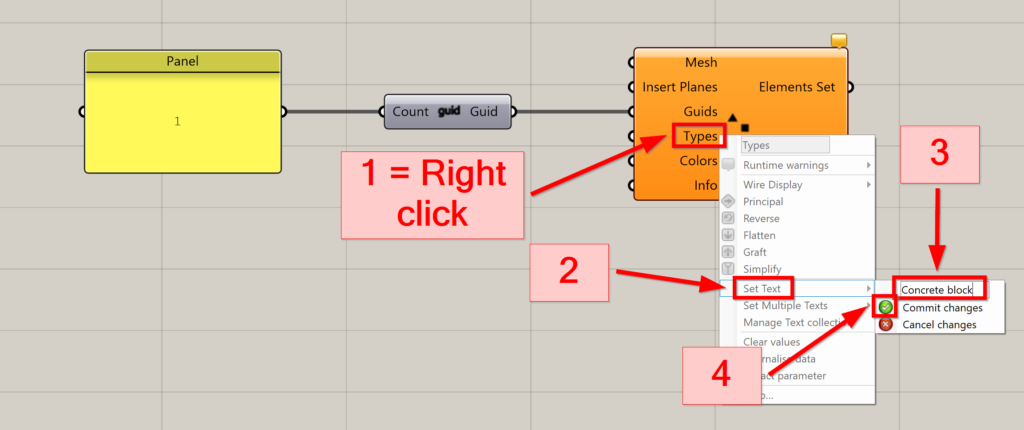
For the Types input we right click on the Types Input on the component >> click on Set Text >> Insert some text. In our example I wrote Concrete block, but this is up to you >> Click Commit changes
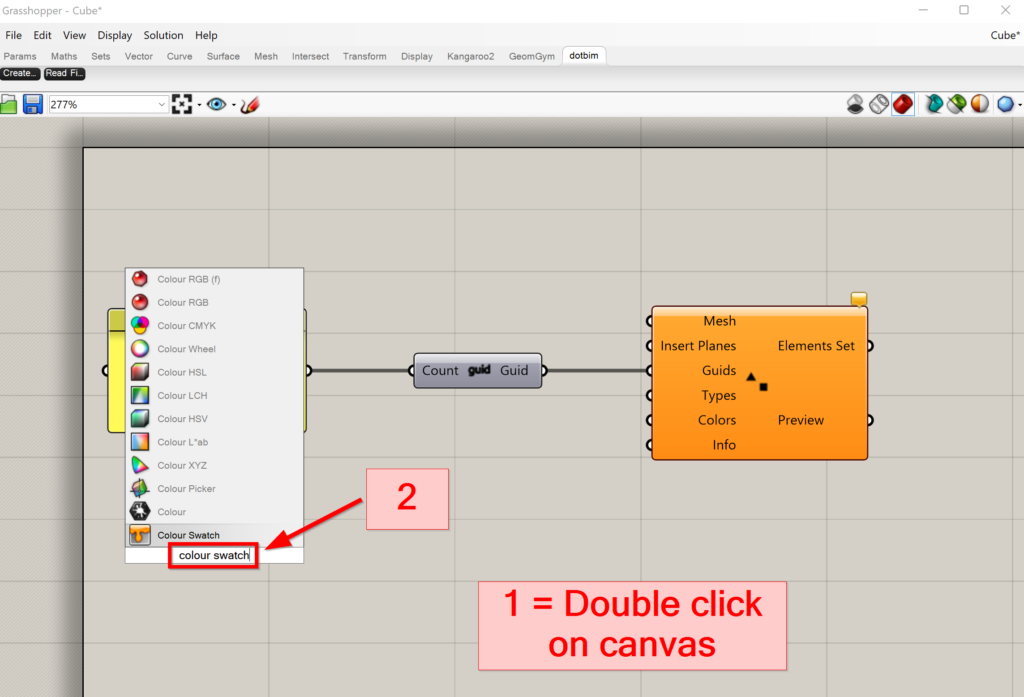
For the colours input, double-click on the canvas and search for Colour Swatch >> pick a colour >> Connect the component with the Colours Input of the Elements Set component.
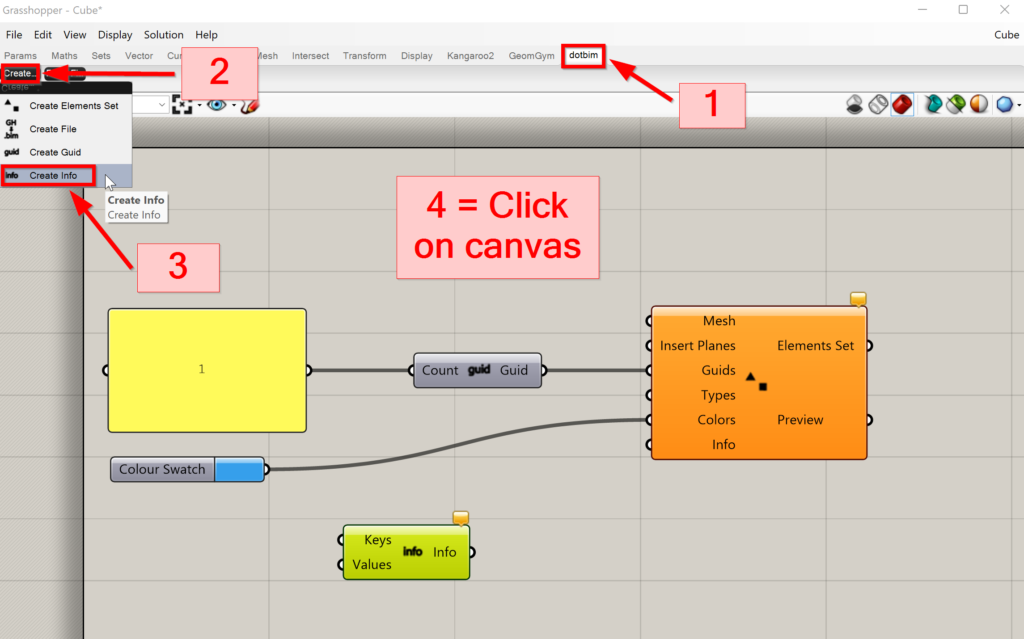
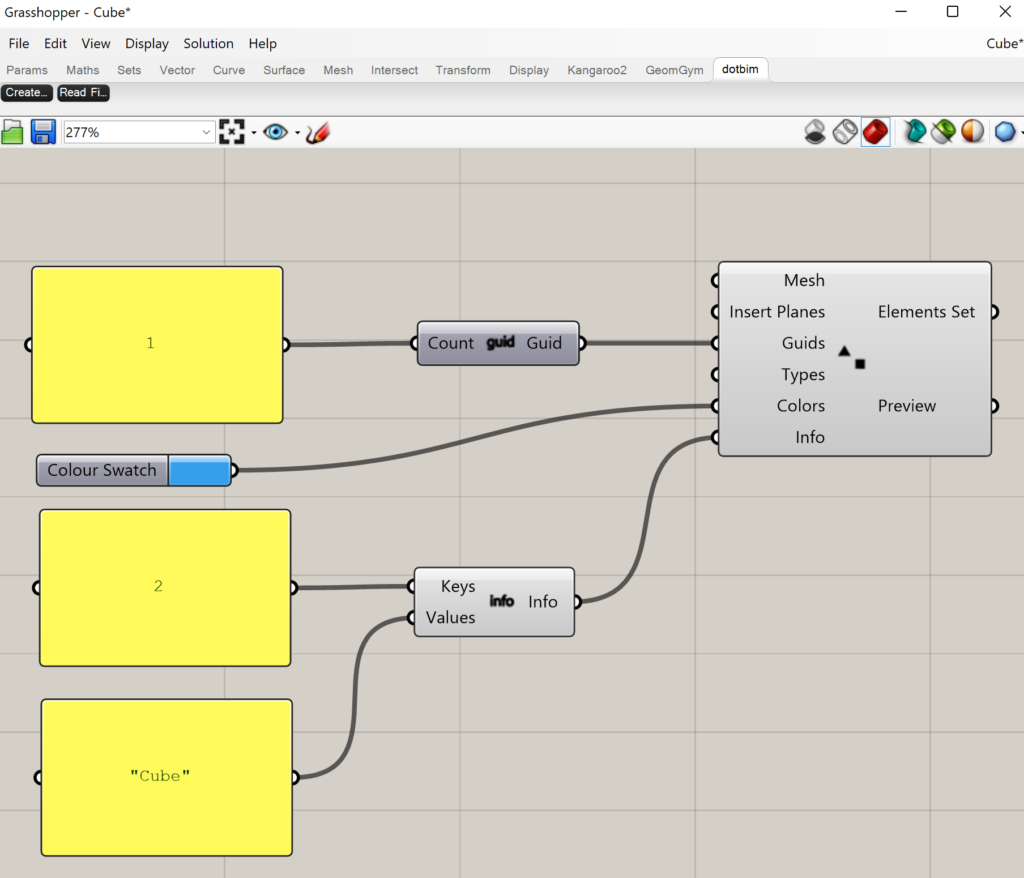
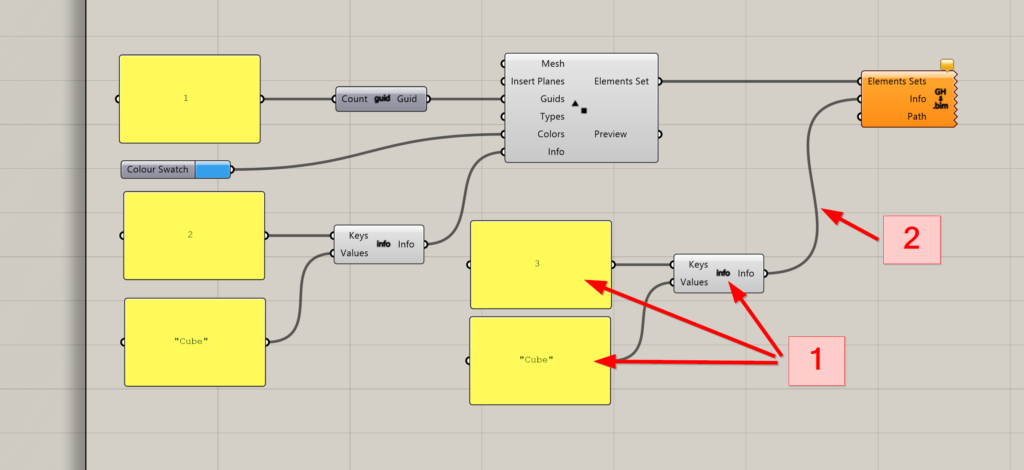
Next, we need to add some information to the mesh(es). To do so we use the Create Info component and 2 panels. We use a number as input for the Keys and a string as input for the Values. It doesn’t matter what your string is but it could make sense to describe the mesh.
Now the export is the only thing that is left. To export the mesh into the .bim format we use the Create file component of the dotbim plugin.
This component needs 3 Inputs in order to export a .bim file
- Elements Set
- Info
- Path
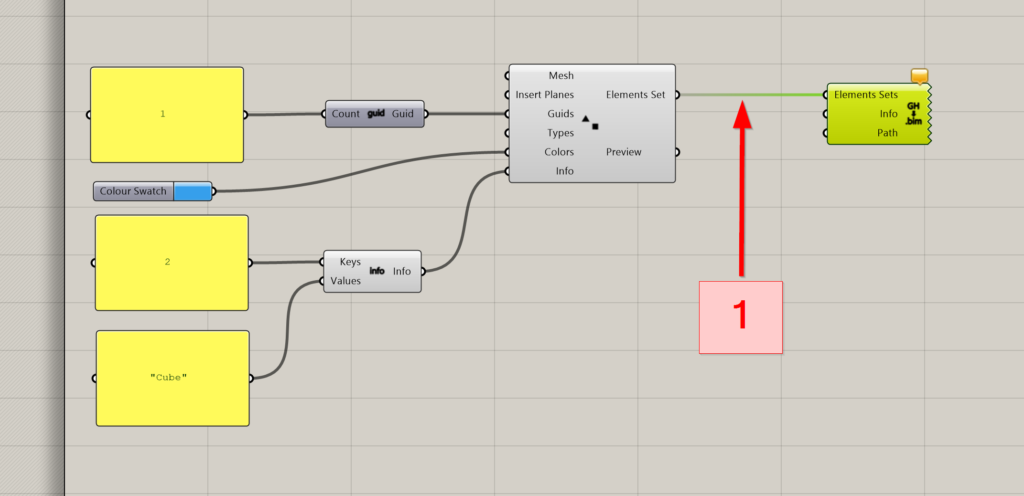
The first one, Elements Set, is the easiest. We just connect the Elements Set component with the Create file component.
The Info Input is again the same as with the Info Input for the Elements Set. We use the Create Info component and 2 Panels and connect them to the Info Input of the Create file component.
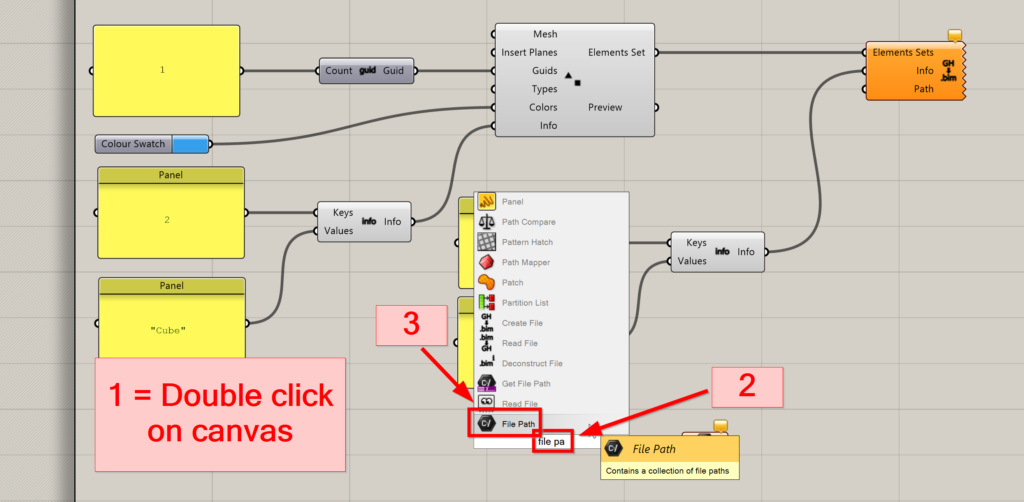
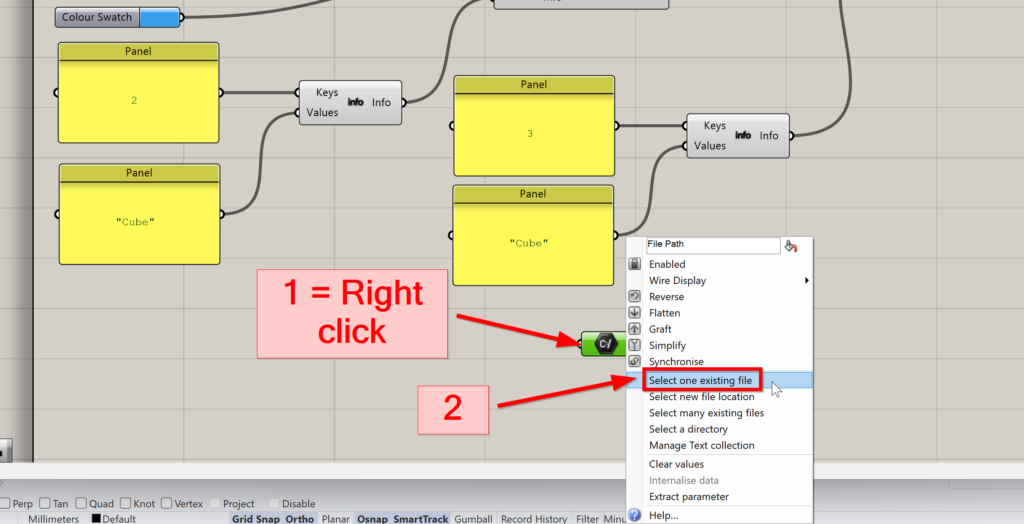
For the Path input, we use the component File Path
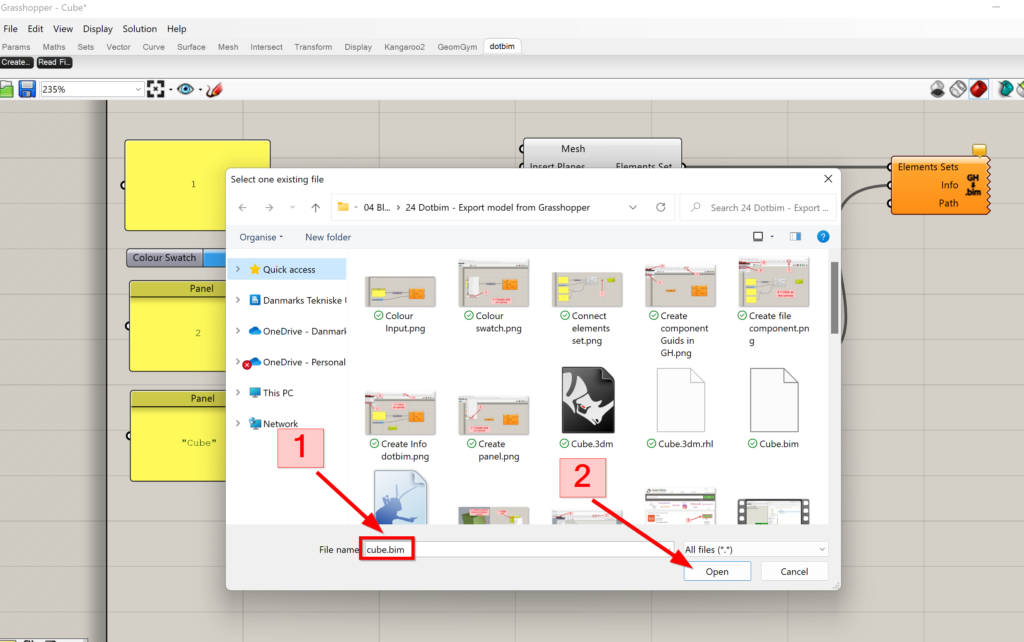
Double click on canvas >> Search for File Path >> Select File Path >> Right click on File Path component >> Click Select one existing file >> Choose the folder where you want to place the .bim file in and❗type in the name of the file with .bim at the end. In our case we call the file cube.bim❗>> Connect the File Path component with the Create file component
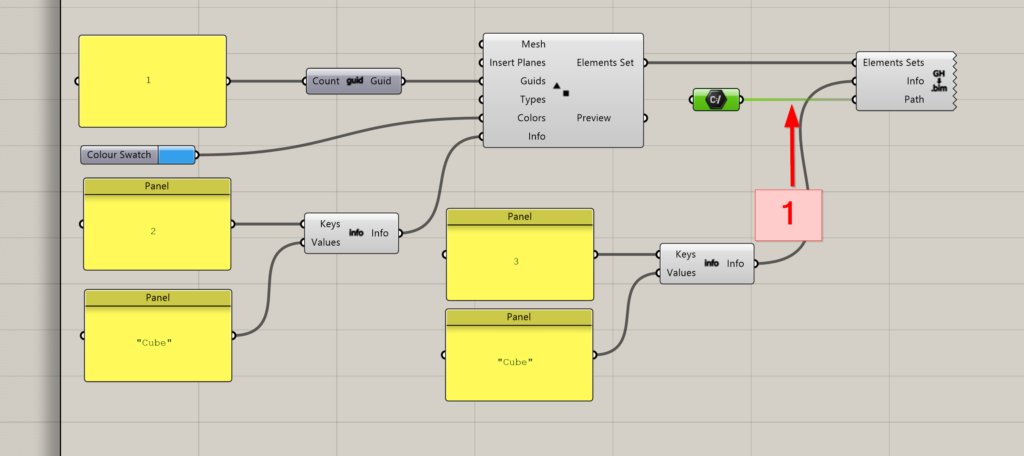
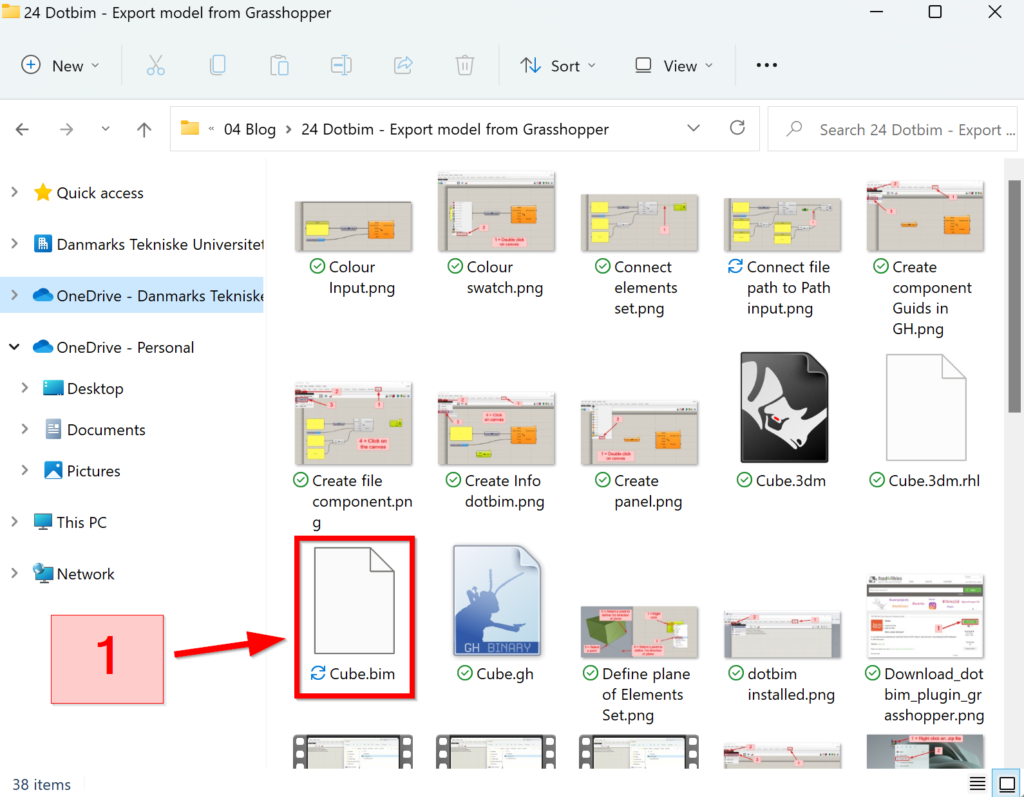
We can now also see that the color of the Create file component changed to grey which gives us an indication that the export worked. Now we go the cube.bim file in the folder that we chose.
4. Visualizing 3D models on your homepage without code
In this section we are going to learn how to employ a .bim 3D model in the web – on homepages or blogs.
We are using Github to store the file on a public server which can always be accessed. So head over there, create an account or log in your profile if you already have an account.
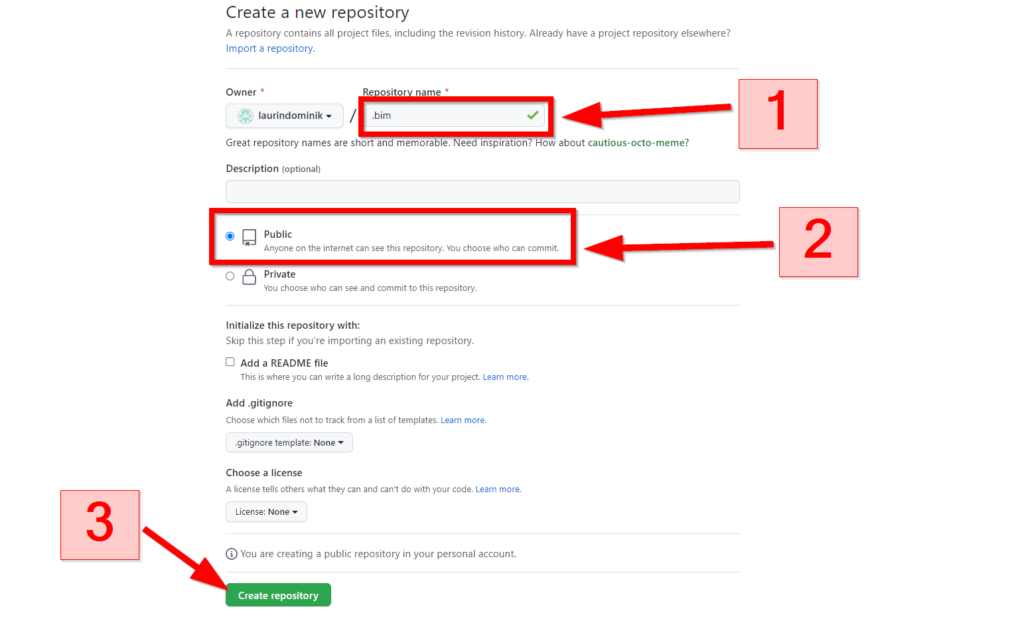
First thing we do is to create a new repository for all of our .bim files.
Give it a name, make it public and click on Create repository
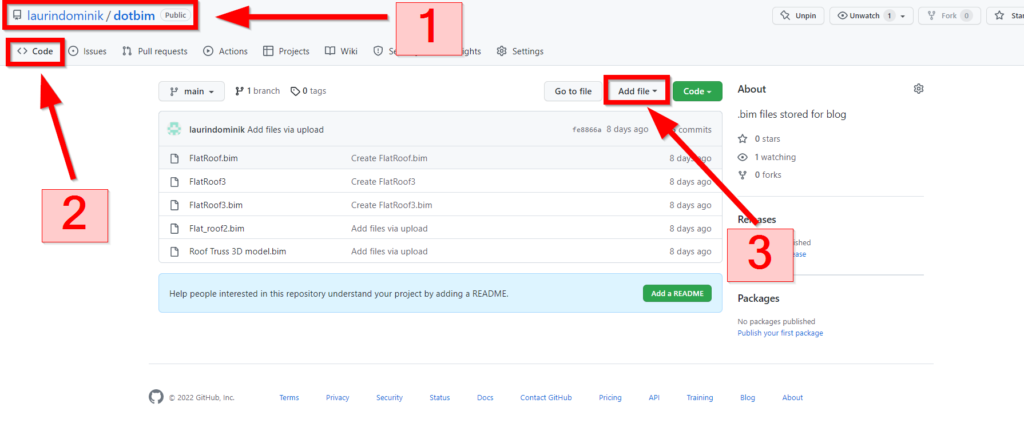
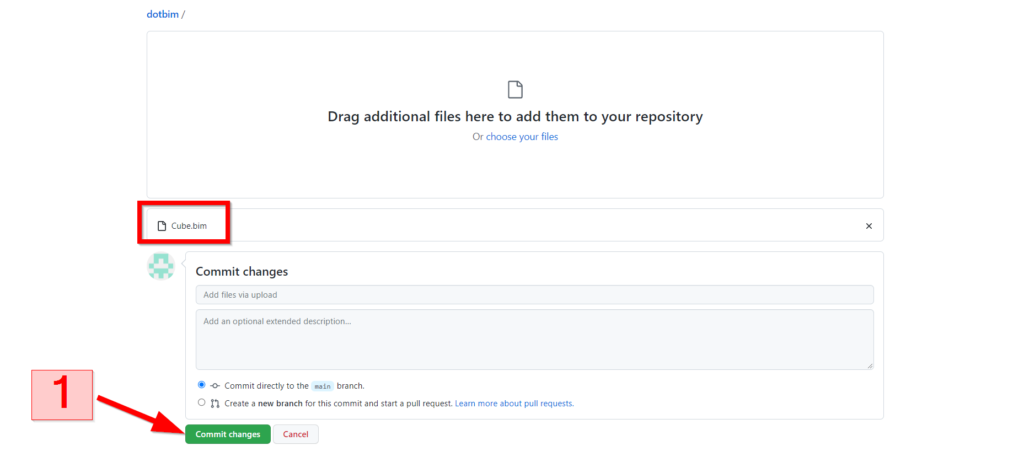
Go into that repository that you just created and click on Add file >> Upload files
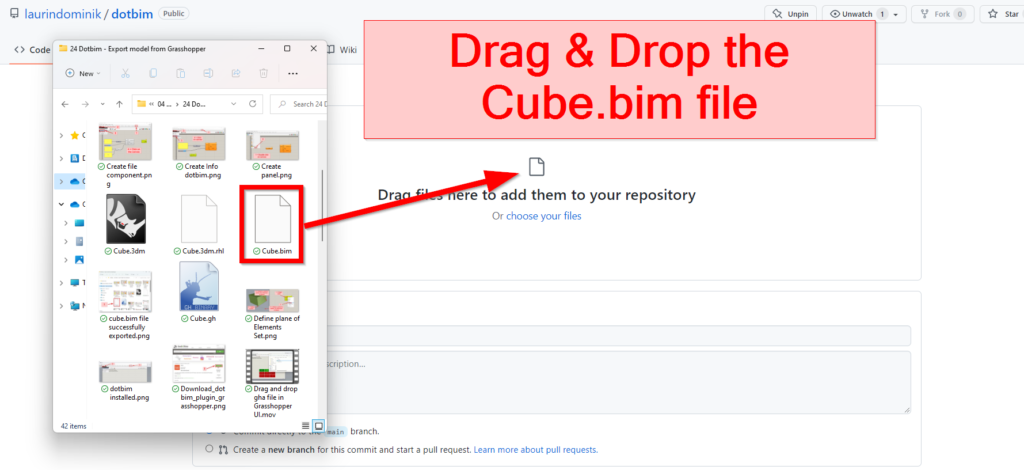
Drag and Drop the Cube.bim file into the Github canvas and click on Commit changes.
Open that file on Github and click on Raw.
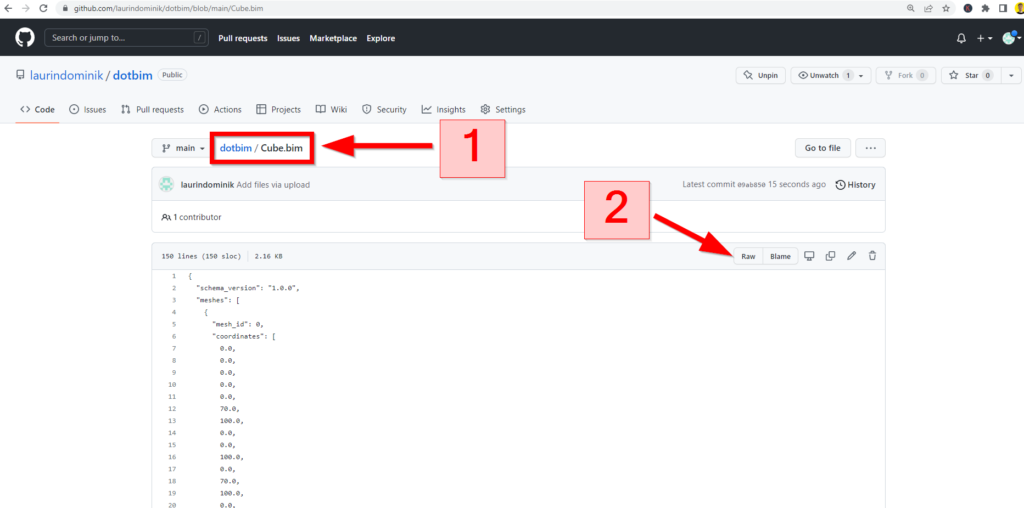
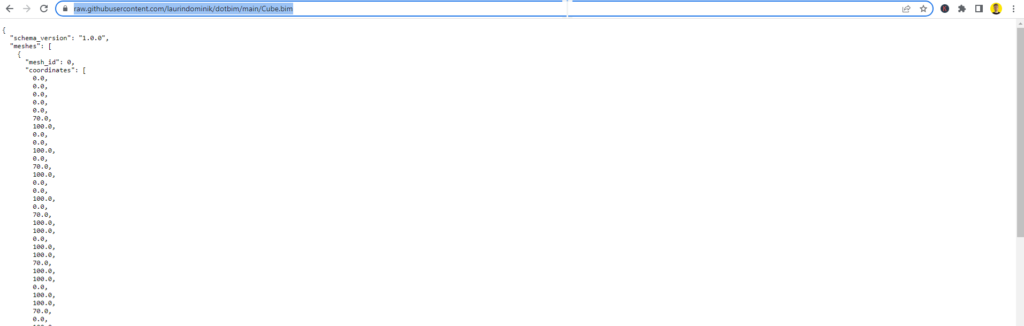
Copy the Url of the Raw Cube.bim file.
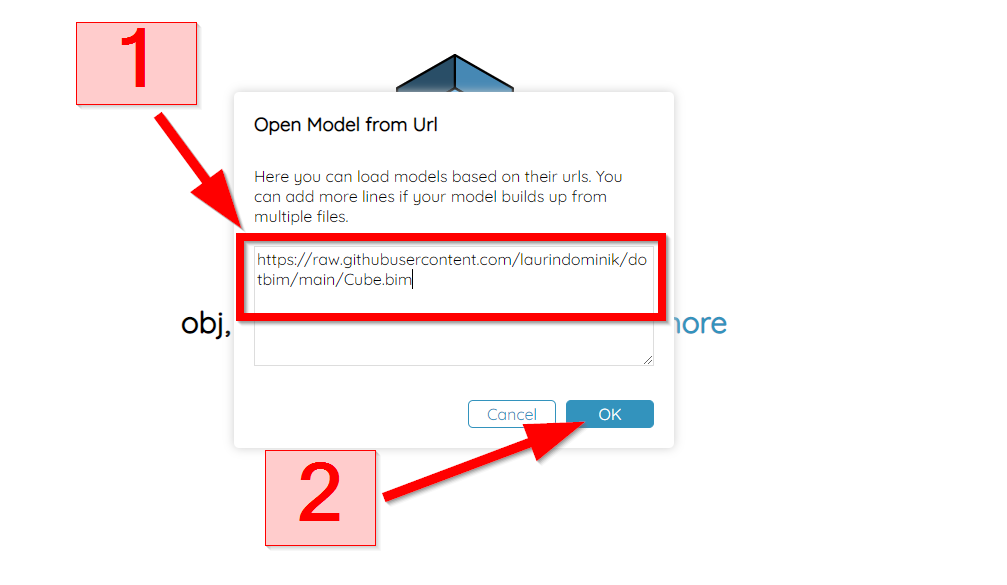
Now let’s open the Online 3D Viewer and click on Open model from a url.
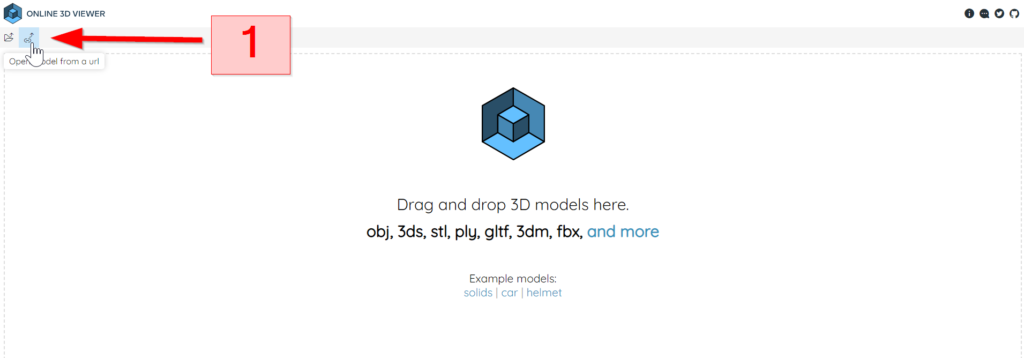
Paste the raw cube.bim url from Github and click on OK.
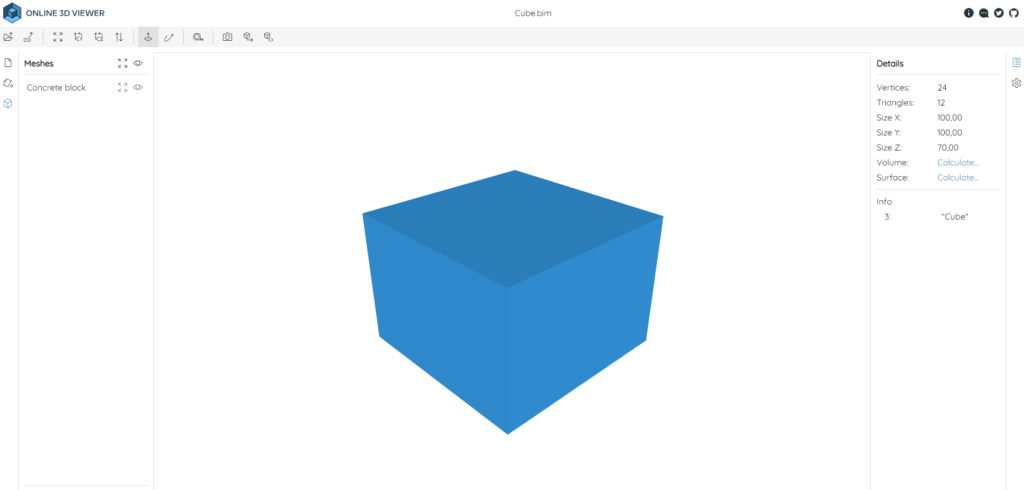
Now we the Cube.bim 3D model is visualized in the online viewer💯
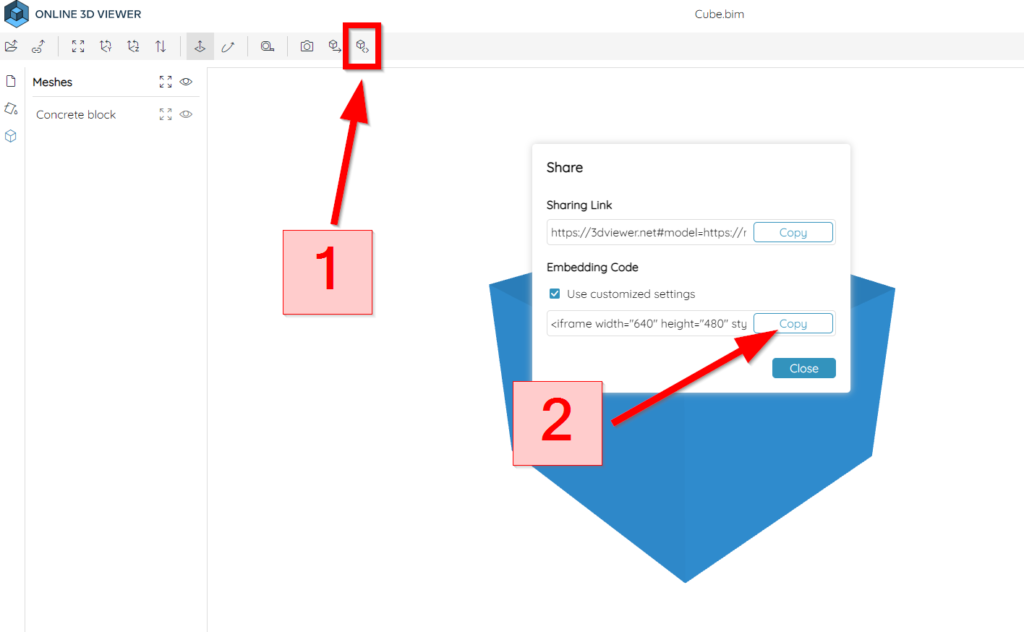
The last step that is now missing is to generate the html code and insert that in your homepage or blog.
Click on Share model, copy the Embedding Code and insert the html code in your homepage.
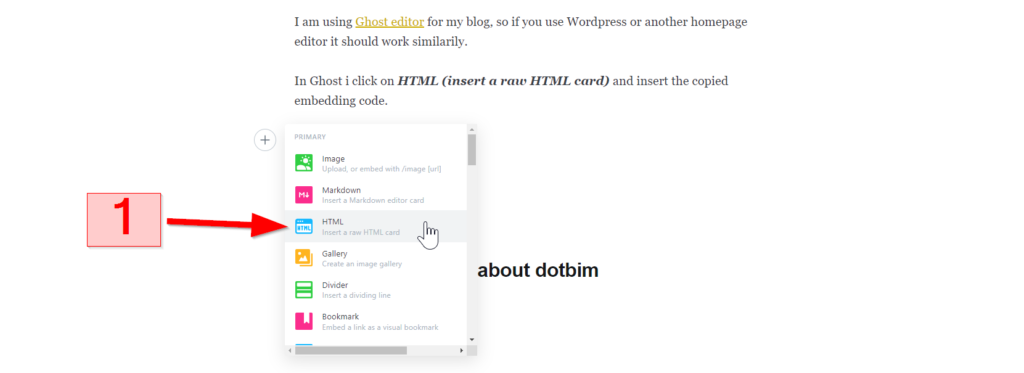
I am using Ghost editor for my blog, so if you use WordPress or another homepage editor it should work similarily.
In Ghost i click on HTML (insert a raw HTML card) and insert the copied embedding code.
And now the 3D model is visible on that position on my blog post. It’s pretty cool, isn’t it?👍
5. More Information about dotbim
I think it’s a pretty interesting project, what do you think? If you want to learn more about it you can check out the articles and podcasts listed below:
- dotbim homepage (here)
- BIMvoice Youtube video: dotbim – Minimalist File Format for BIM with Wojciech Radaczyński (here)
- BIM Corner blog post: .bim – a new BIM file format (here)
Now, I would like to hear from you: What use cases do you see for this file format and its abilities? Let us know in the comments below📝.

![How To Link Mendeley To Overleaf [Step-By-Step]](https://www.structuralbasics.com/wp-content/uploads/2023/06/Link-Mendeley-to-Overleaf-768x439.jpg)